Developer Blog

08/03/2021 by Lars-Göran Fredriksson

Using CANlib Visual Studio 2017 VB canlibCLSNET

In this document I will show you how to enable CANlib in Visual Studio 2017 when creating a Visual Basic (VB) project. I will show how to create WIN32 and WIN64 applications. I will also show how to handle the platform-settings: x86 and x64. When this is done, you can use the same project (source code) for creating WIN32 and WIN64 applications without editing your code. The instructions in this document can also be used when enabling CANlib in an existing project.


Important information from the author:

Since CANLib version 5.30, the support for canlibCLSNET has been removed. Instead we now supports “.NET Standard 2.0.”

If you intend to use .NET Standard 2.0, please read the blog, Using CANlib Visual Studio 2017 VB .NET Standard 2.0.


Abbreviations

VS2017Microsoft Visual Studio 2017 (VB)

CANlib Kvaser CANlib SDK www.kvaser.com/download


Before we start...

First we must download and install “Kvaser CANlib SDK“ and also “Kvaser Drivers for Windows”. After you have installed CANlib, please check your hard-drive and identify where “canlibCLSNET.DLL” has been installed.

On my 64-bit Windows machine it is installed here:

c:\Program Files (x86)\Kvaser\Canlib\dotnet\win32\fw40\canlibCLSNET.dll

c:\Program Files (x86)\Kvaser\Canlib\dotnet\x64\fw40\canlibCLSNET.dll

As you can see, one is for building 32-bit and one is for 64-bit applications.

Please remember where you found them, as you will need this information soon.

Please also install “Microsoft Visual C++ Redistributable for Visual Studio 2017” if you not have done it. (Installs by default if you install the C++ tools when installing VS2017.)

Now we are ready to start Visual Studio 2017 (VB).

(I have used “Microsoft Visual Studio Professional 2017” when creating this text.)


Creating an empty project

Creating a project in VS can be done in many different ways, this is one way to do it.

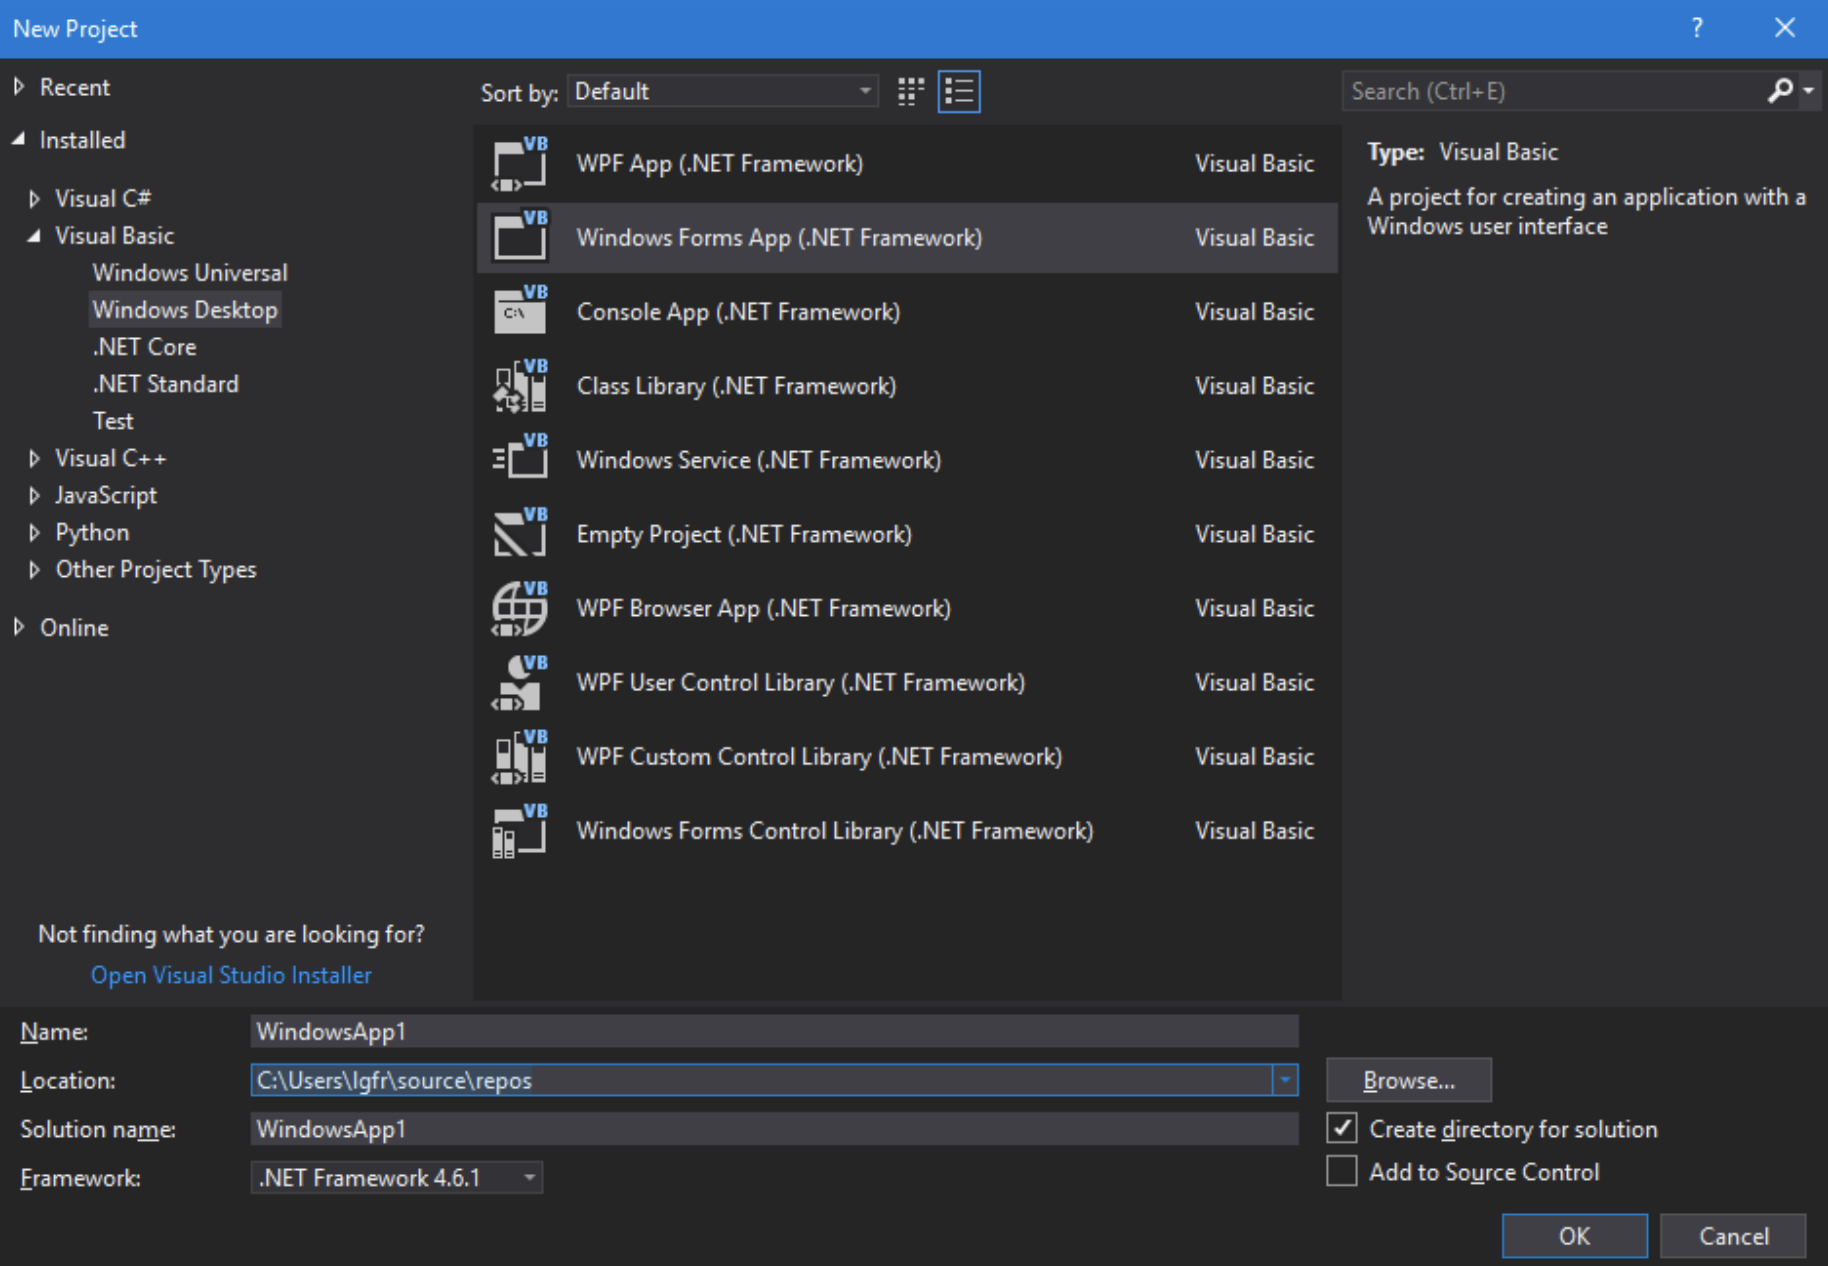
Press, “File” – “New” -”Project…”

Screen Shot 2018-11-13 at 7.41.49 PM

I chose to create a Windows Forms App (.NET Framework) Visual Basic

Edit the name and the rest of the unique information and press “OK”.

Screen Shot 2018-11-13 at 7.42.59 PM

Now VS2017 creates an application for us.

It is a bit boring, just an empty form that does almost nothing.


Adding some code that uses CANlib (VB)

I will now add some code that uses CANlib; exactly what it does is not important in this example. For more information about how to use CANlib, please check CANlib SDK Help.

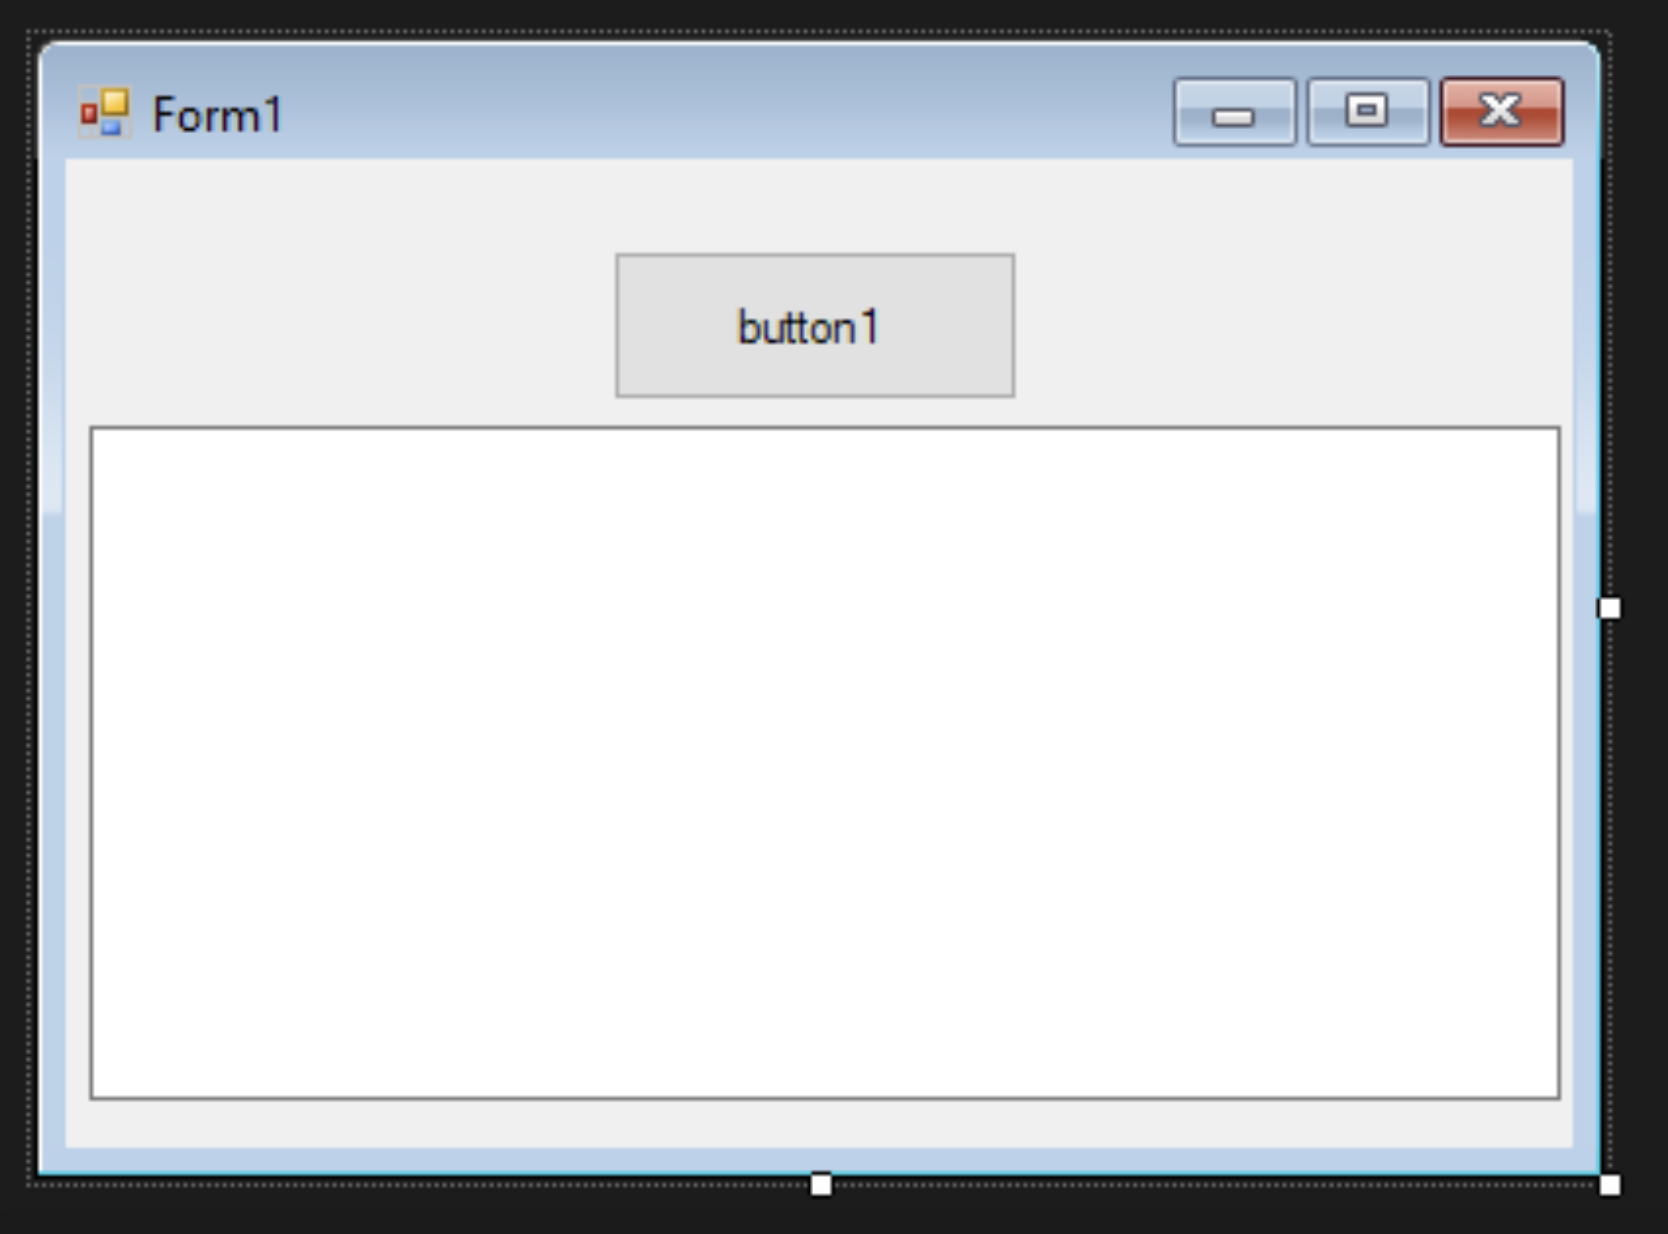
To add a BUTTON and a TEXTBOX, change the property “Multiline” on the textbox to true. (I assume that you are familiar with how to add components in VS2017, I will not show it here).

After a bit of editing, we have this beautiful application:

Screen Shot 2018-11-13 at 7.44.29 PM

It still does nothing, so in the editor, double click on “button1” and add some code inside the “button1_Click” function.

Private Sub Button1_Click(sender As Object, e As EventArgs) Handles Button1.Click
        TextBox1.Text = "Hello Visual Basic .Net (c)2018 Kvaser AB" & vbNewLine

        canlibCLSNET.Canlib.canInitializeLibrary()

        'Dim channel As Integer
        Dim channel = 0
        Dim hnd0 As Integer
        Dim R As canlibCLSNET.Canlib.canStatus

        hnd0 = canlibCLSNET.Canlib.canOpenChannel(channel, canlibCLSNET.Canlib.canOPEN_ACCEPT_VIRTUAL)

        R = canlibCLSNET.Canlib.canSetBusParams(hnd0, canlibCLSNET.Canlib.canBITRATE_250K, 0, 0, 0, 0, 0)

        R = canlibCLSNET.Canlib.canBusOn(hnd0)

        TextBox1.Text += "Channel 0 and 1 initiated" & vbNewLine
    End Sub

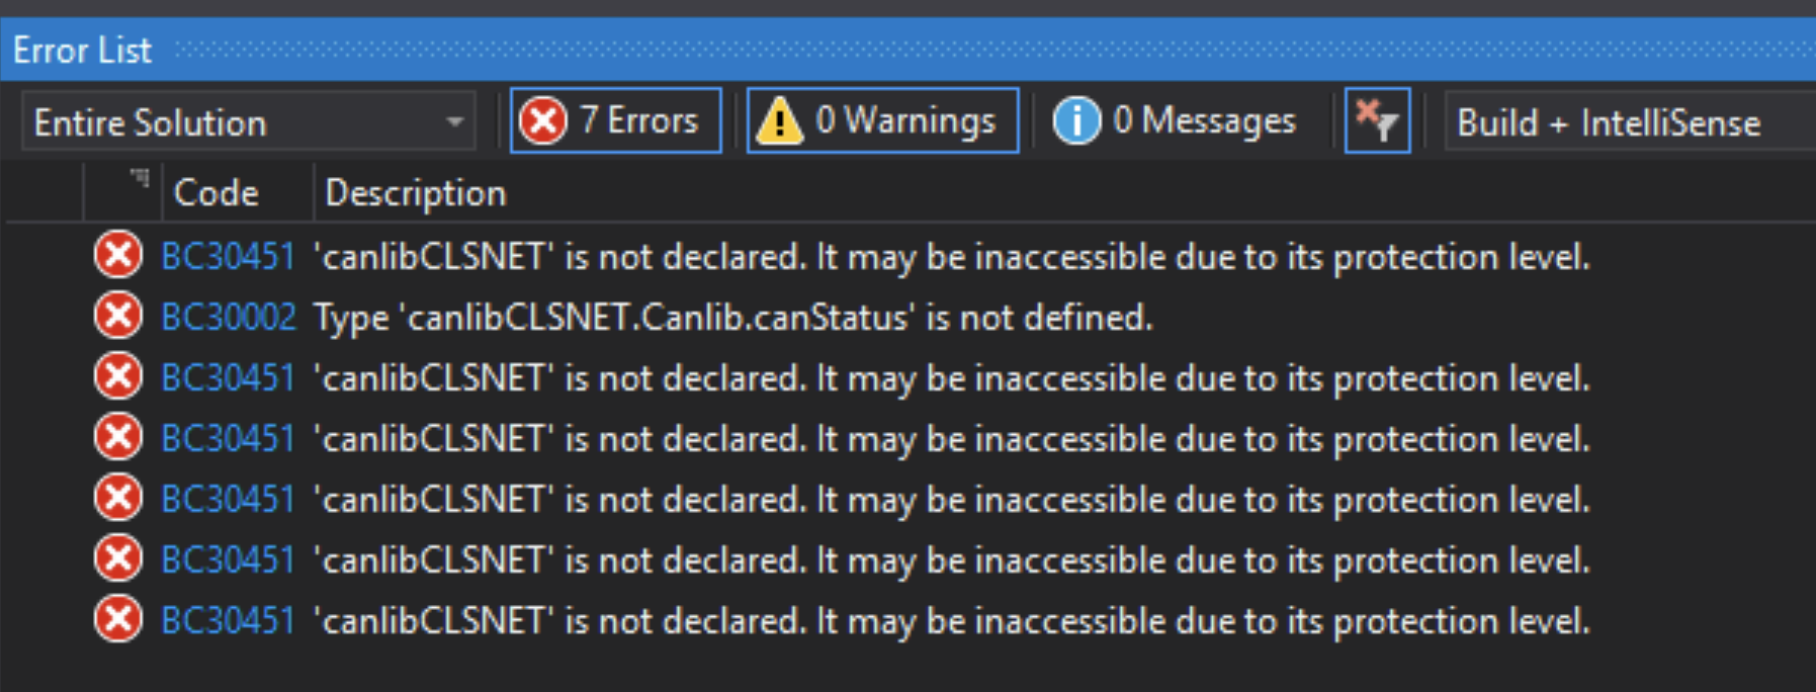
When I try to run the application, I get multiple errors. Something is wrong and VS2017 cannot find CANlib.


Enabling the WIN32 and WIN64 platforms

When creating an VB application, VB defaults to “Any CPU” as the target CPU platform. We can not use Any CPU as platform because we can only link to one version of canlibCLSNET.

We must now enable the x86 (win32) and the x64 (win64) platforms.

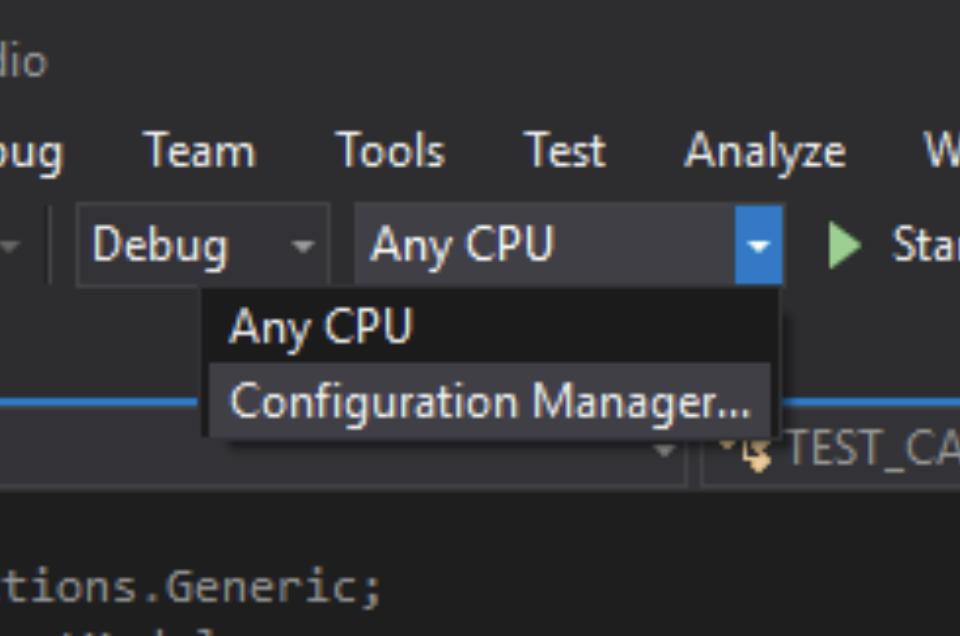
Select “Configuration Manager…”:

Screen Shot 2018-11-13 at 7.47.35 PM

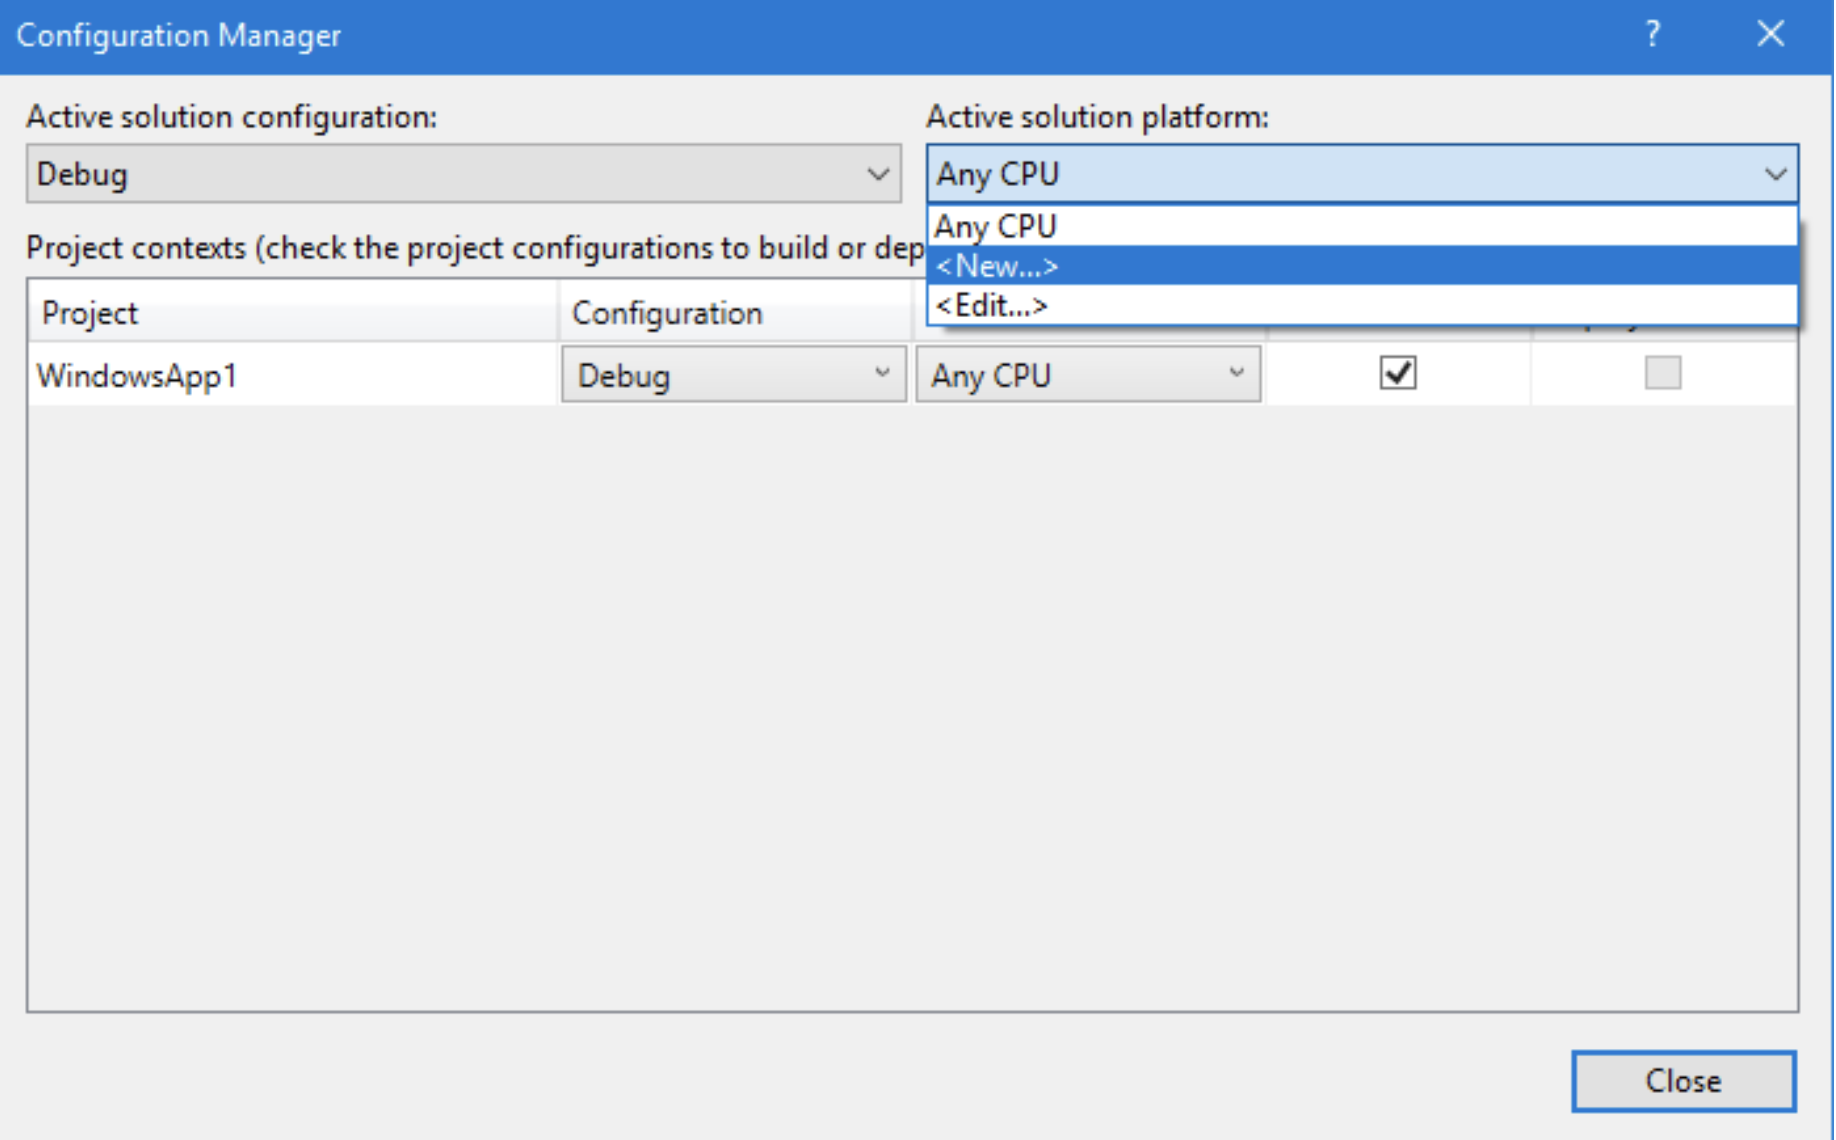
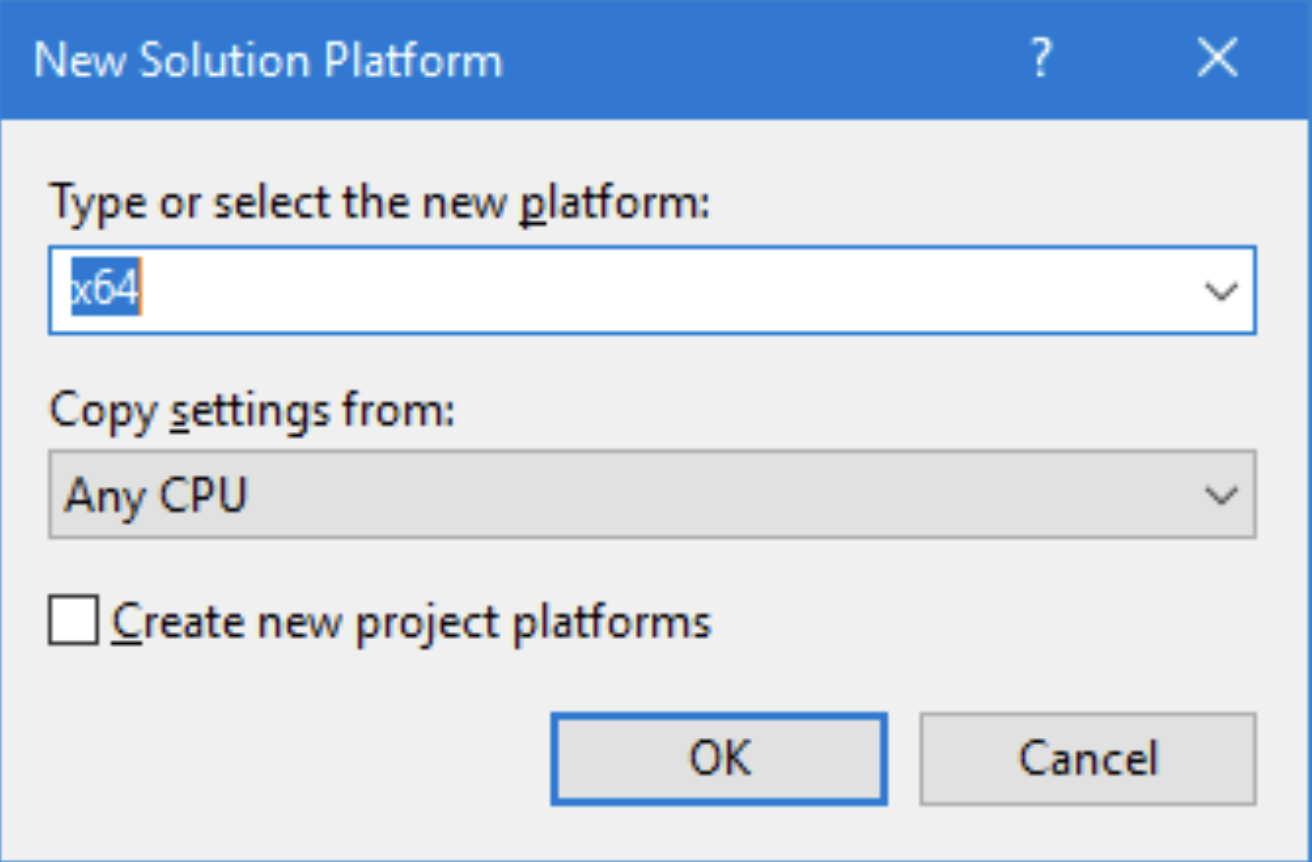
Select “<New…>” and add x86 and x64:

Screen Shot 2018-11-13 at 7.48.38 PM

Important: Use the “new” from the “Active solutions platform”, not from “Project contexts”.

Create the new platforms x64 and x86 (we will have to do this twice). Copy settings from “any CPU”:

Screen Shot 2018-11-13 at 7.49.28 PM

I do this for x86 and x64. I also deletes the AnyCPU platform to make sure that I not enabling it by mistake in the future (select EDIT and remove it).

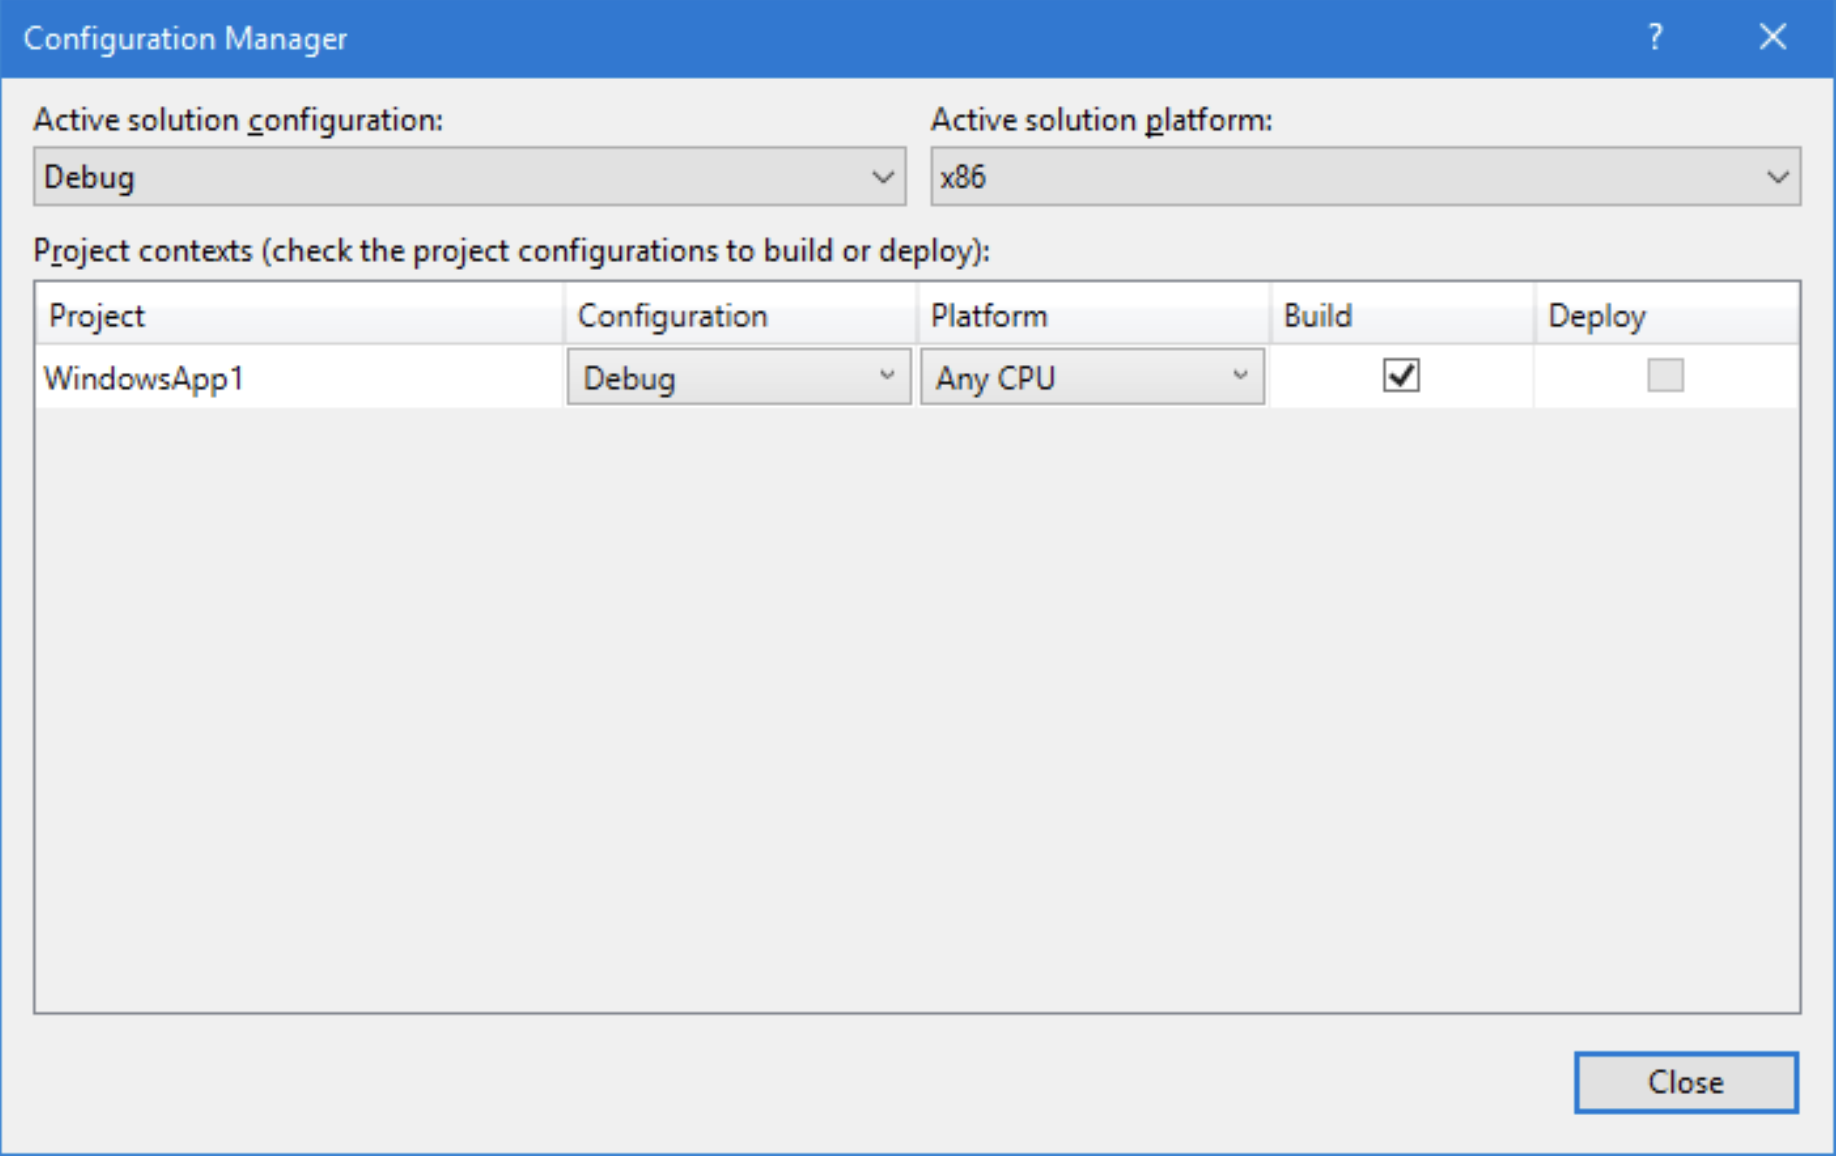
Now I must edit the configuration manager to make sure that we are using the correct platform.

Screen Shot 2018-11-13 at 7.50.22 PM

In the picture above, we can see that even if we have selected the combination DEBUG/x86, the compiler will try to create the platform “Any CPU”.

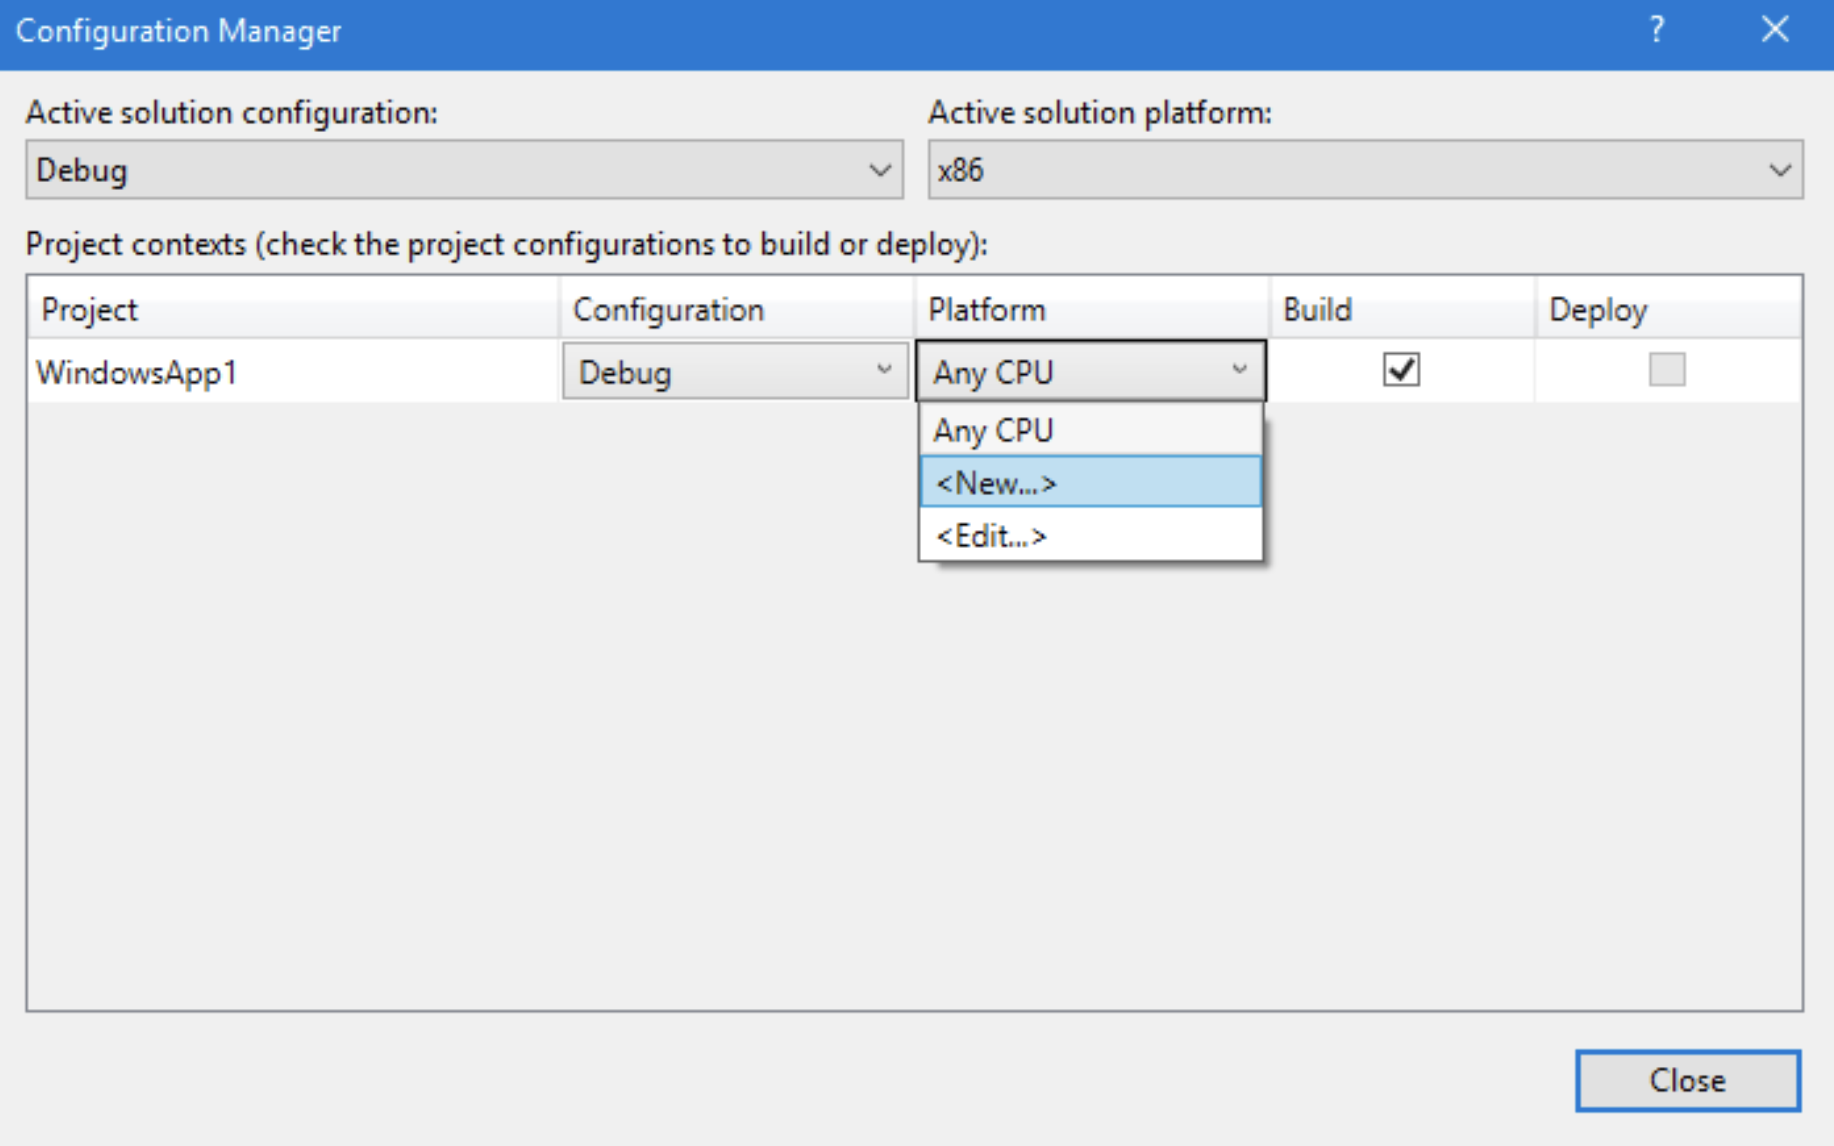
This time I select NEW from “Project contexts”

Screen Shot 2018-11-13 at 7.51.24 PM

Create the platform x86. Do this for all four combinations:

Debug/x86 Use x86

Debug/x64 Use x64

Release/x86 Use x86

Release/x64 Use x64


Verifying Target CPU and setting output path

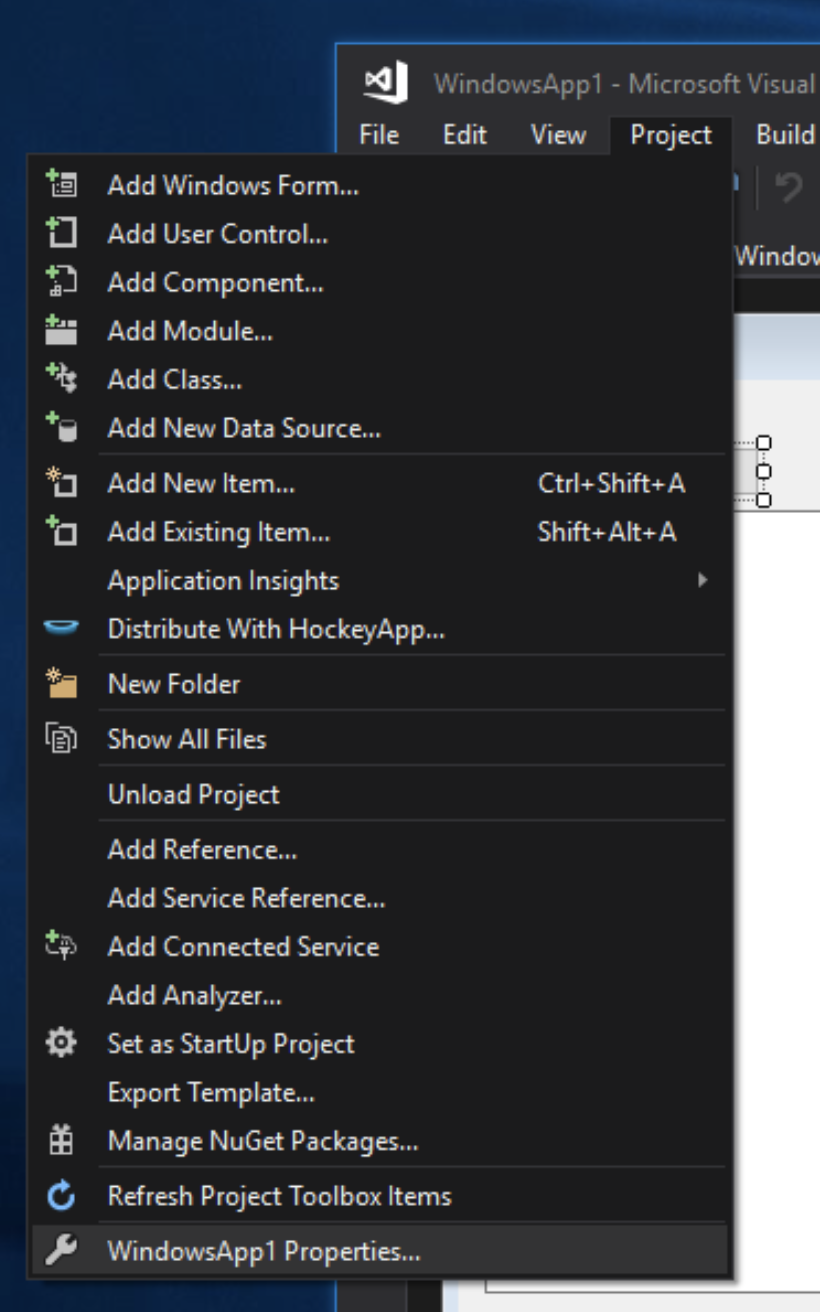
Open PROJECT/PROPERTIES
I can open the PROPERTIES in two different ways:

1 Meny: Project / appname properties

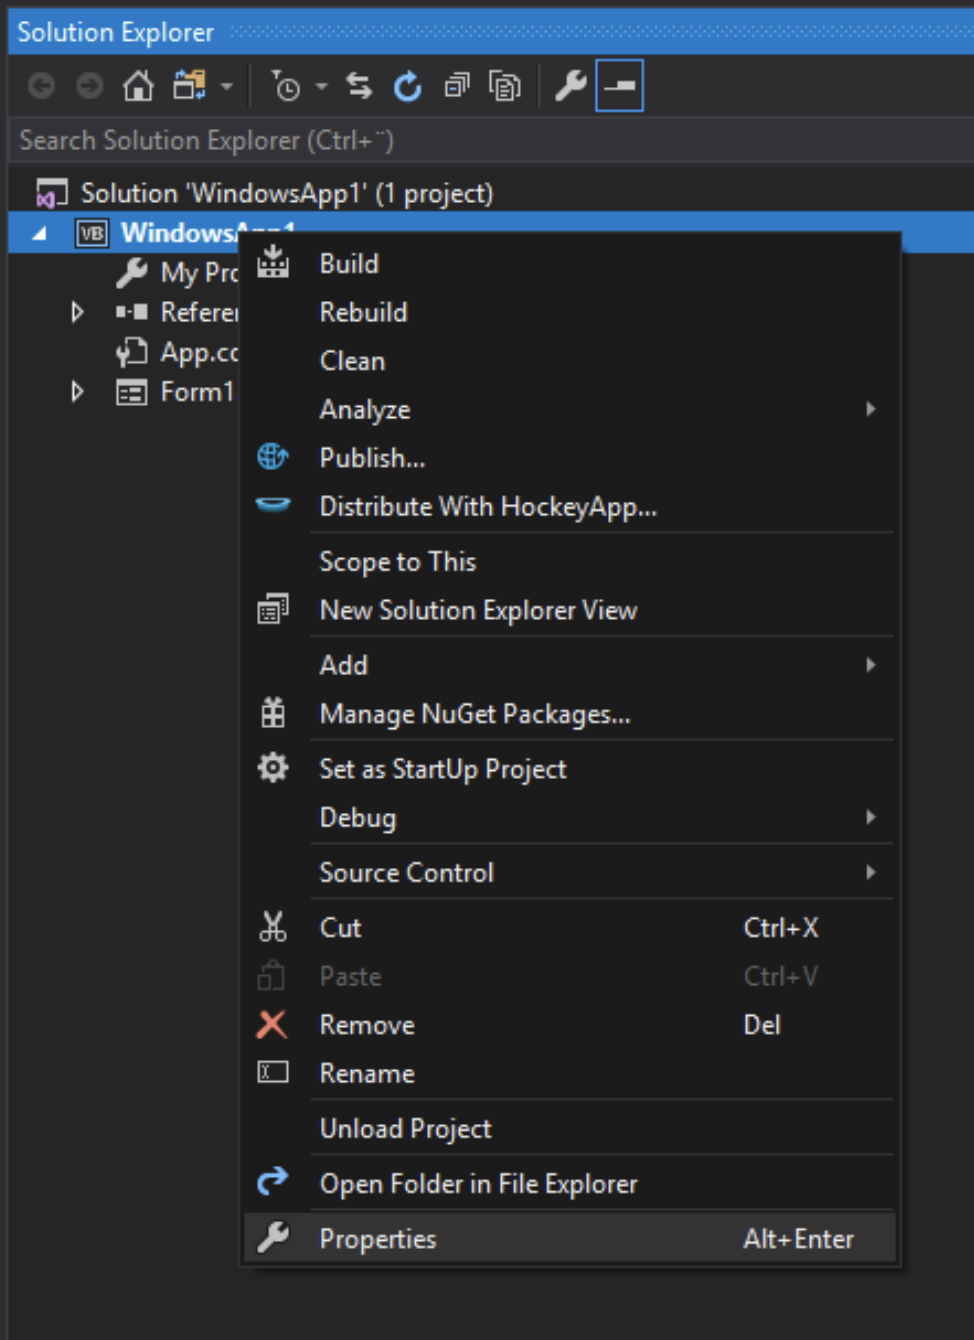
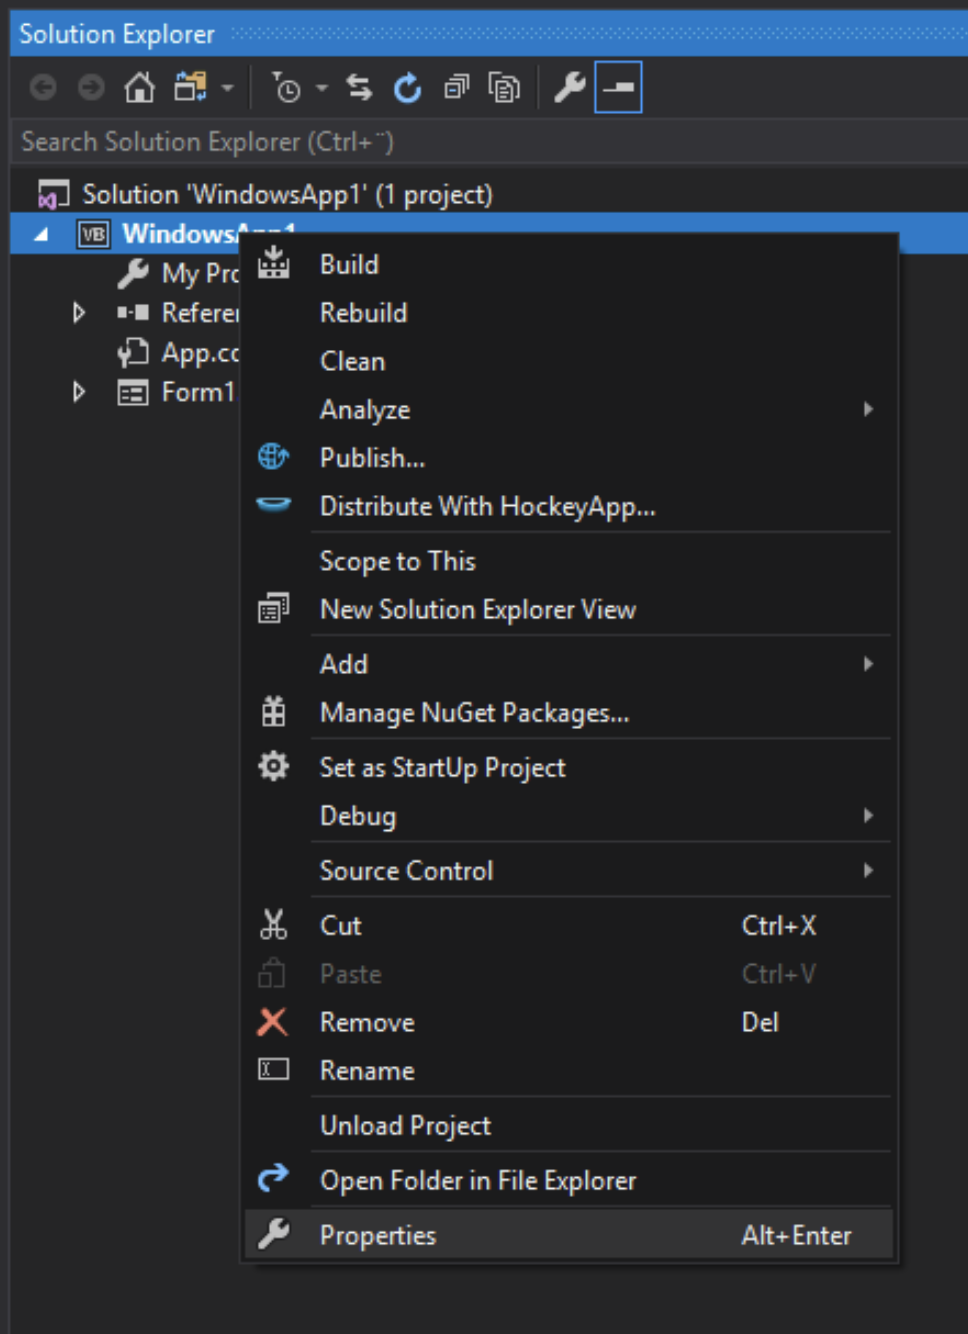
2 Solution Explorer, right click on the appname, select properties.

Screen Shot 2018-11-13 at 7.54.21 PM
Screen Shot 2018-11-13 at 7.54.31 PM

In some versions of Visual Studio, there is a bug in the properties page when it is opened with the first method. This bug sometimes claims that the platform is not selectable. If we use the second method, then the page works perfect.

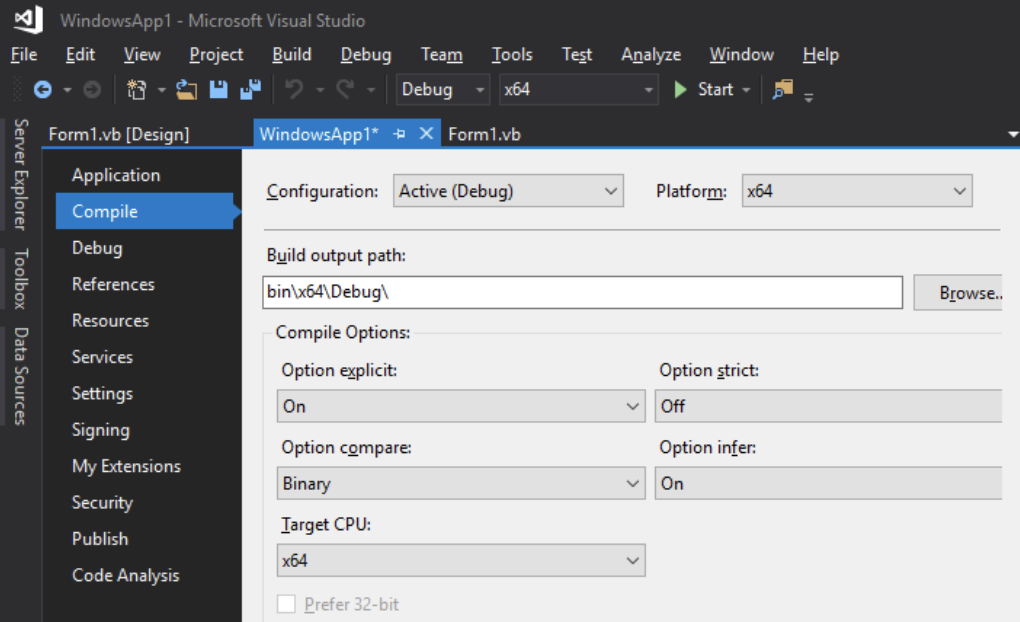
Check that Target CPU is correct for all four Configuration/Platform combinations.

Screen Shot 2018-11-13 at 7.56.33 PM

Set Build Output Path(Optional)
When we are checking the Target CPU, we can also (if we want) edit the output path.

Default is:

bin\x86\Release\

bin\x64\Debug\

bin\x64\Release\

bin\x86\Debug\

I prefer:

bin\Debug\x86\

bin\Debug\x64\

bin\Release\x86\

bin\Release\x64\

I think this makes it a bit easier for me to find the built applications.


Adding a reference to canlibCLSNET.dll

In order to use CANlib in a VS2017 project, I must add information to show where VS2017 can find “canlibCLSNET.dll”. It is only possible to add a reference to either the x86 version or the x64 version. However, with a minor modification in one file, we can enable both. I will show that later in this document.

Select “x86” as platform:

Screen Shot 2018-11-13 at 7.58.49 PM

When I try to BUILD, then I get the errors:

Screen Shot 2018-11-13 at 7.59.34 PM

Yes, I am missing a “Reference”

I must add the “Reference” to canlibCLSNET

Adding canlibCLSNET.DLL for x86
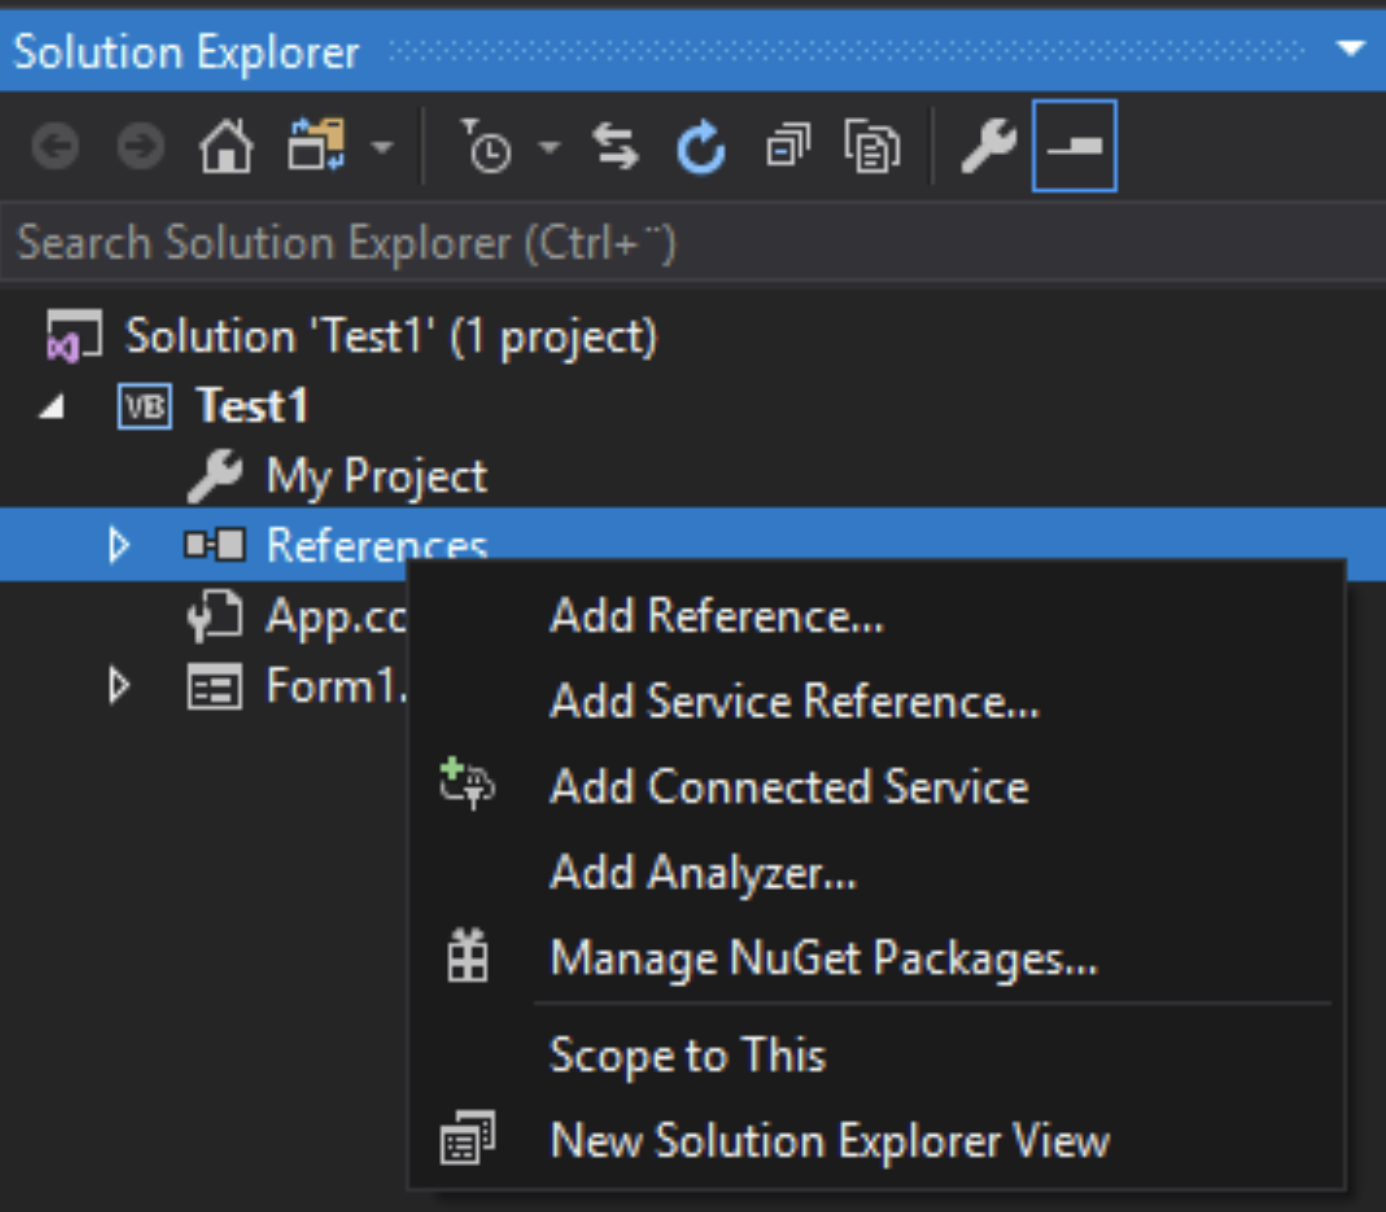
Right click on “References”, and select “Add Reference…”:

Screen Shot 2018-11-13 at 8.01.33 PM

Select Browse and then click on the button “Browse…”:

Screen Shot 2018-11-13 at 8.02.05 PM

(If you have done this before, then VS2017 will show canlibCLSNET.dll in the window as you can see in my example.)

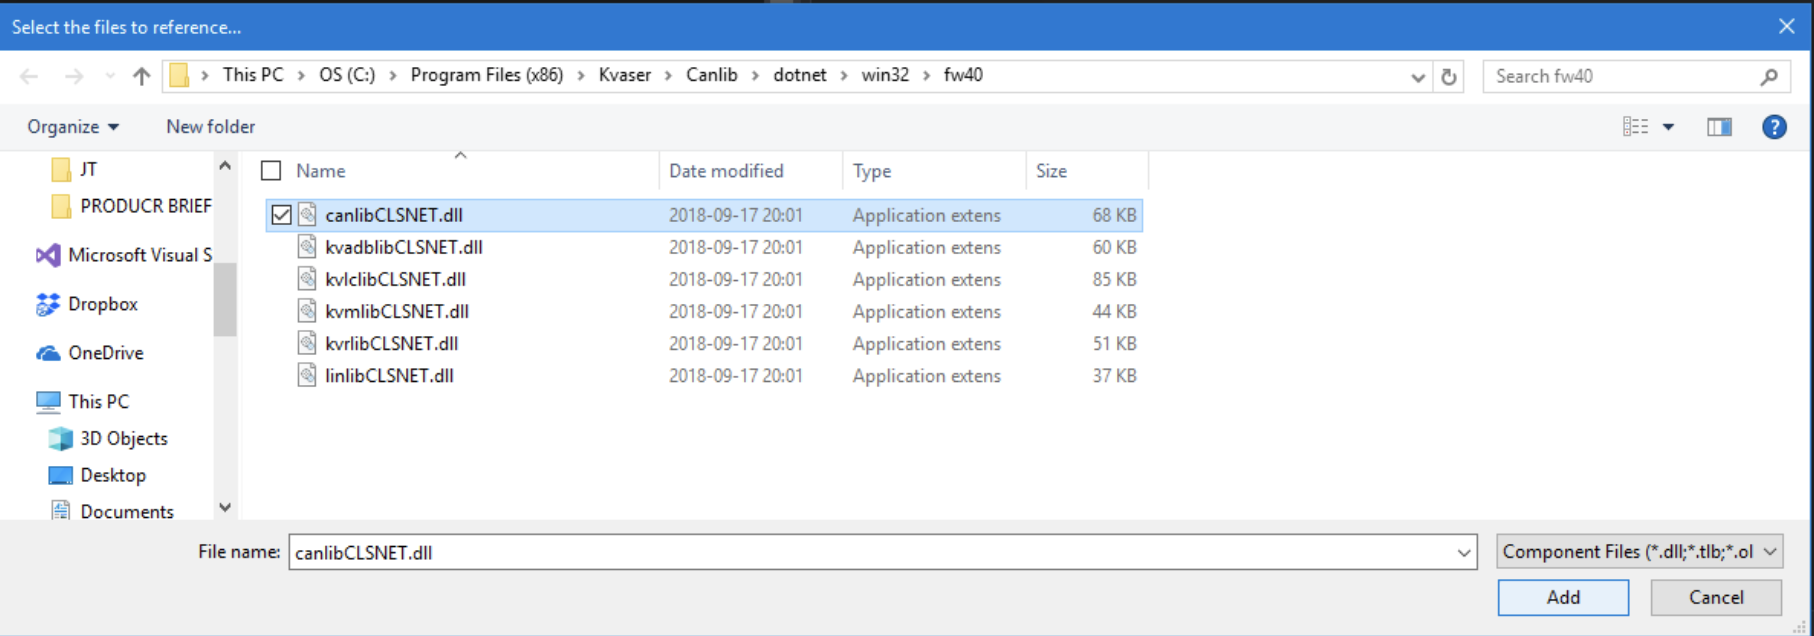
Select “c:\…\…\win32\fw40\canlibCLSNET.dll” (Hope you remembered it):

Screen Shot 2018-11-13 at 8.03.25 PM

I am selecting the WIN32 version (even if I intend to use the WIN64 at a later date).

Press the “OK” button.

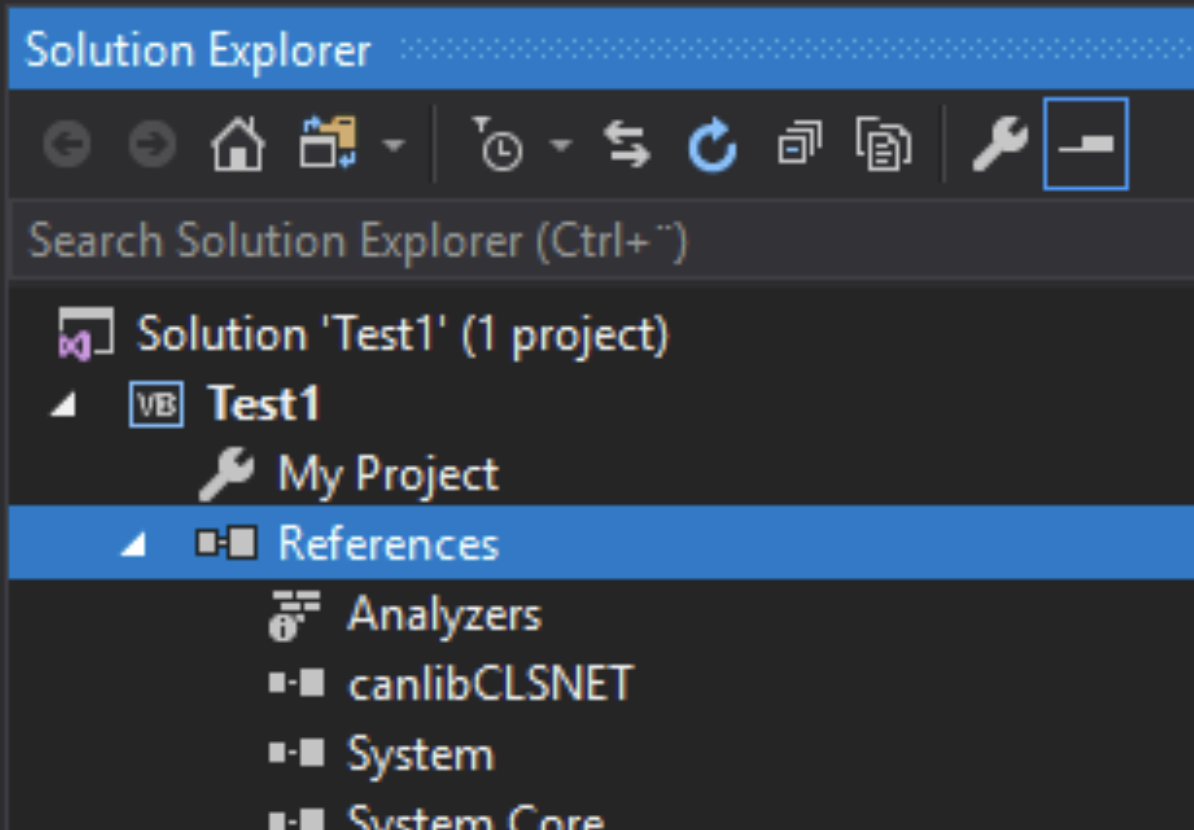
Now I can see that the canlibCLSNET reference has been added:

Screen Shot 2018-11-13 at 8.04.13 PM

If I try to BUILD and RUN the application, it works!

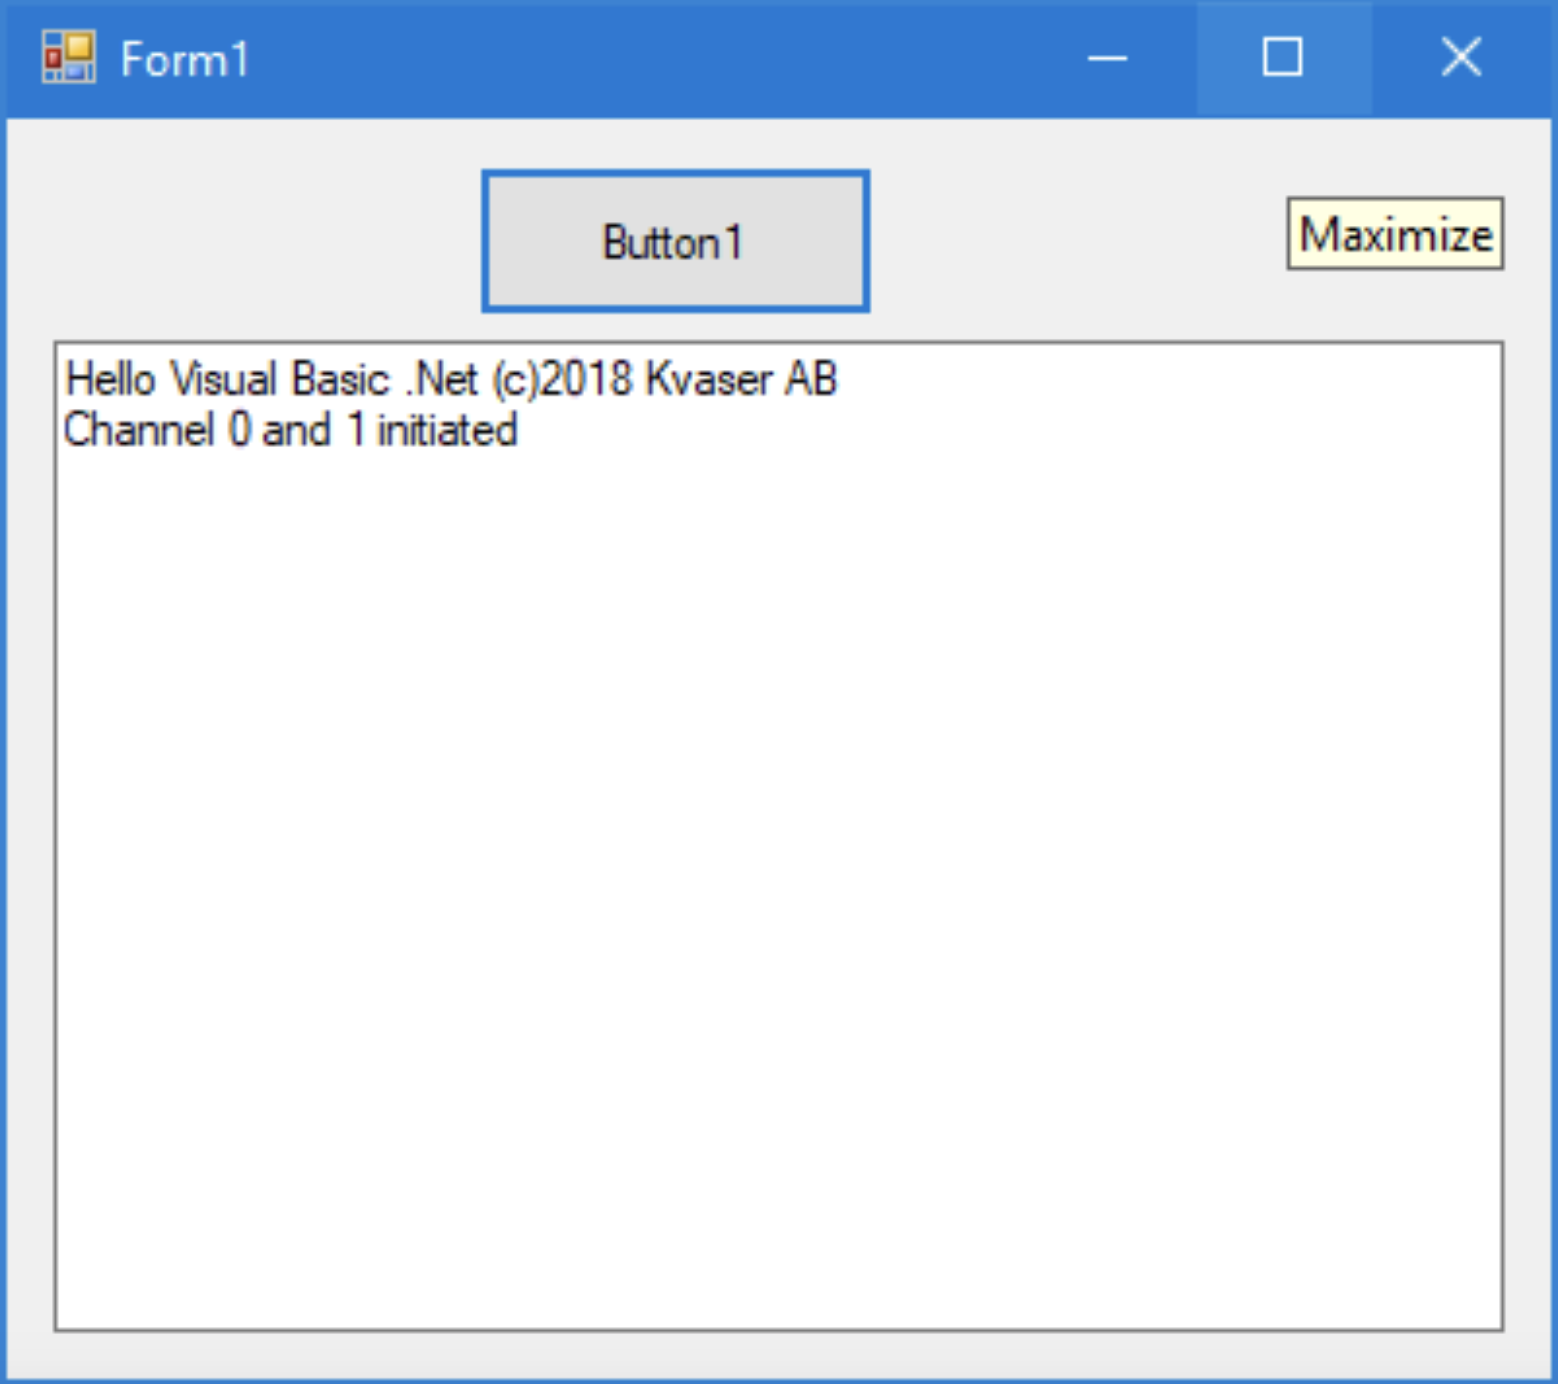
When I press Button1, something will appear in the textbox:

Screen Shot 2018-11-13 at 8.05.10 PM

Adding canlibCLSNET.DLL for x64
Select x64 as platform

Screen Shot 2018-11-13 at 8.07.01 PM

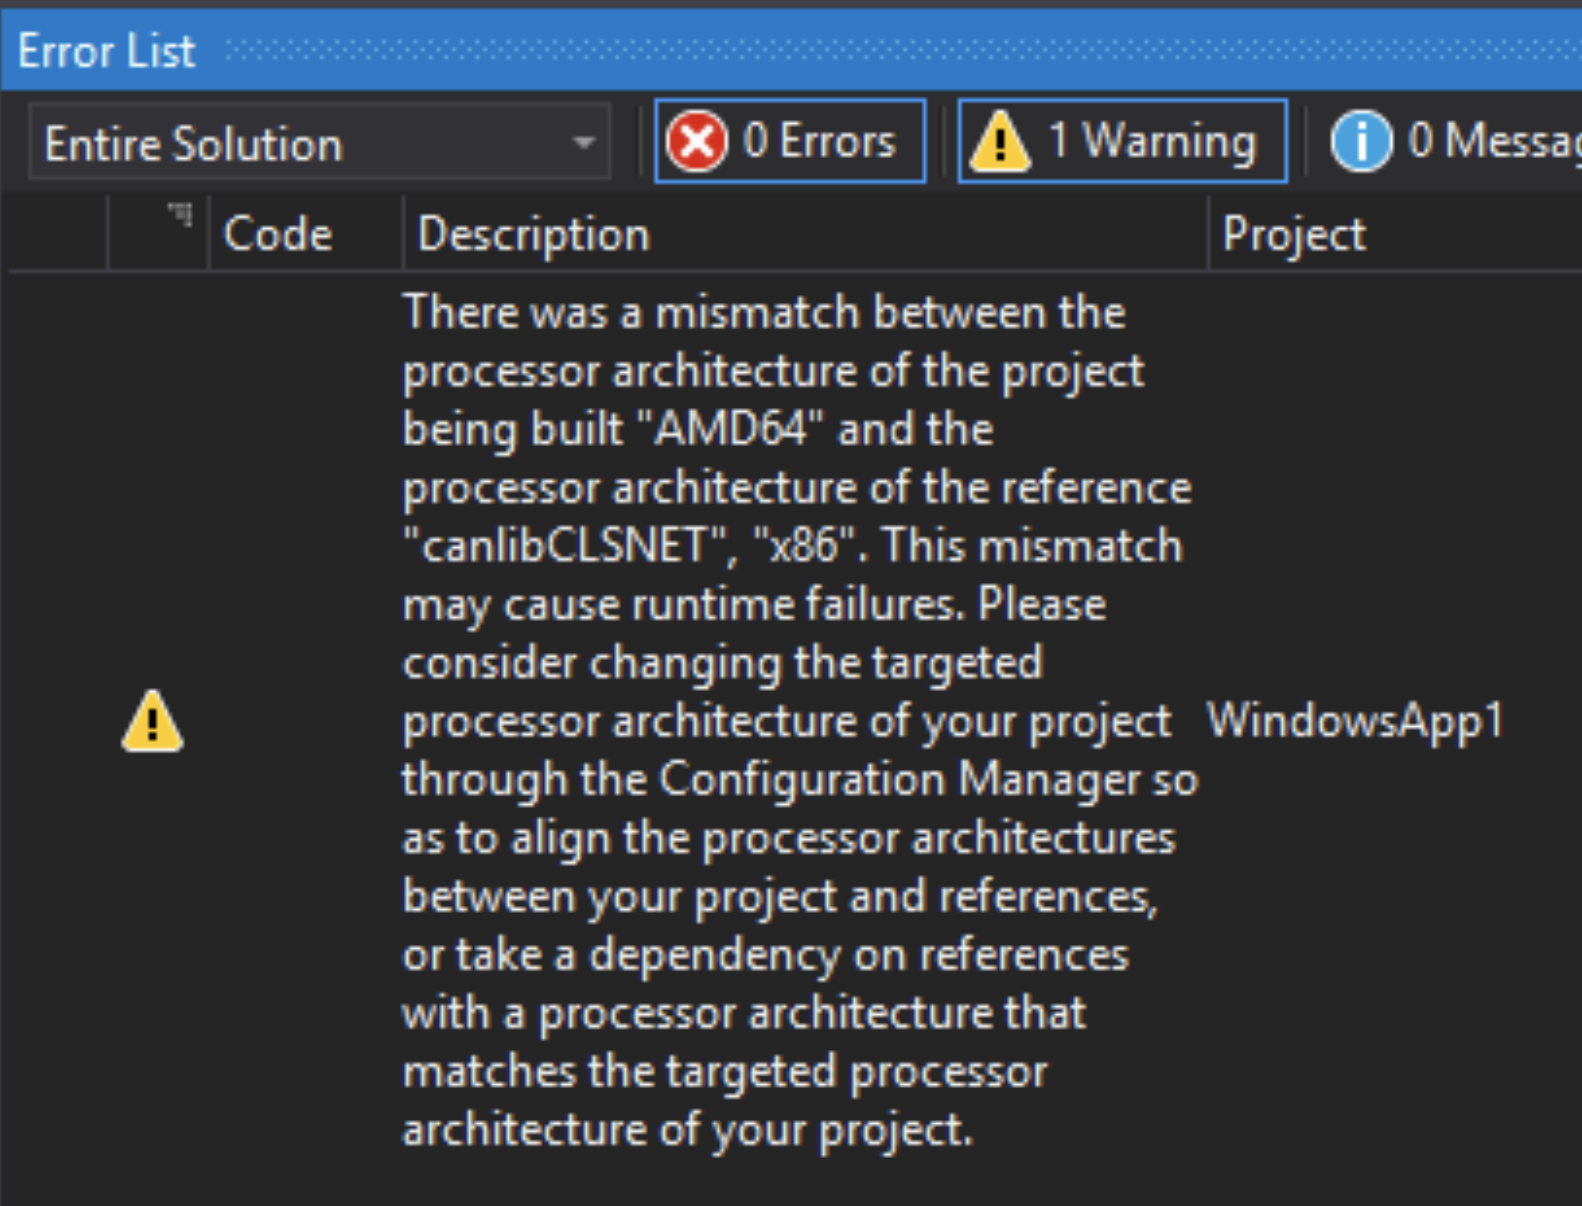
If I try to build the application, no errors or warnings will appear. But some warnings and errors when I try to run the application.

Screen Shot 2018-11-13 at 8.08.10 PM

I can only add one version of canlibCLSNET.DLL. So I must remove the reference to the x86 version, before I add the x64 version.

(Please wait a bit to remove the reference, we can keep it and manually enable both x86 and x64. I will show how below)


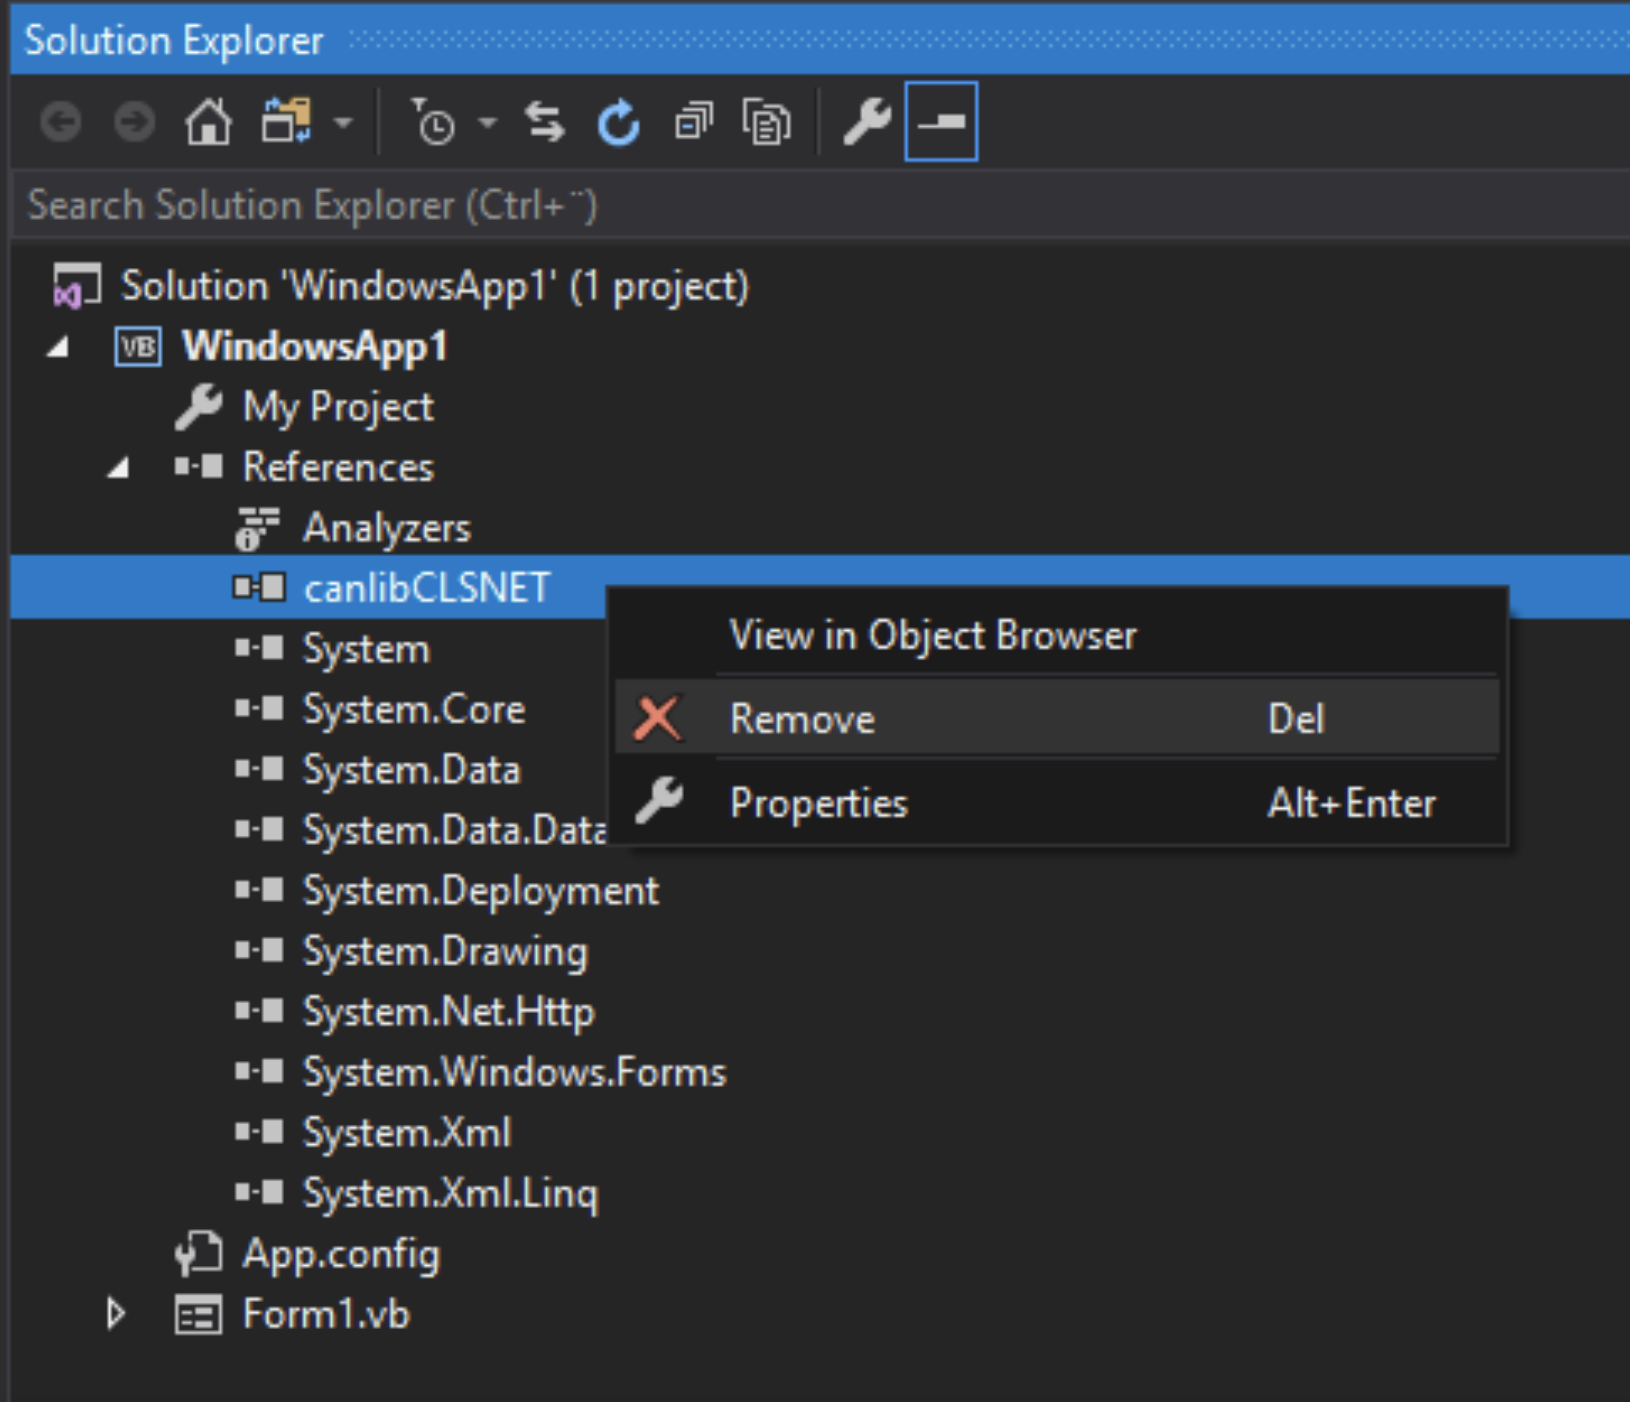
Remove reference to canlibCLSNET
Remove the reference by right clicking on it and select REMOVE

Screen Shot 2018-11-13 at 8.09.38 PM

When the reference id removed, I can add the reference to x64. Follow the same procedure as in adding canlibCLSNET.DLL for x86.


Manually adding canlibCLSNET for x86 and x64
It is possible to add the reference for canlibCLSNET for both x86 and x64 at the same time. When building the application, the correct version will be used and no errors or warnings shall appear.

I will show two methods, one manual and one automatic version.

Both version works fine and which one you should select depends more how you later decides to handle your software. 

The manual method (section 7.4.1) gives you more control of the version and you must manually copy the dll files in the future when updating to never SDK versions. 

The automatic version (section 7.4.2) copies the latest installed SDK files and includes them into your project.

If you are unsure, use the automatic version, you can switch method whenever you want.

1 – Manually adding canlibCLSNET for x86 and x64

Before we start, add the reference for x86 and test it with BUILD and RUN.

(Please read section 7.4.2 before trying this method)

When VS2017 is building the application, it also copies the canlibCLSNET.DLL to the application directory.

If we turn this feature off, and manually copies the DLL files, then  we can use the x86 reference for both x86 and x64 platform.

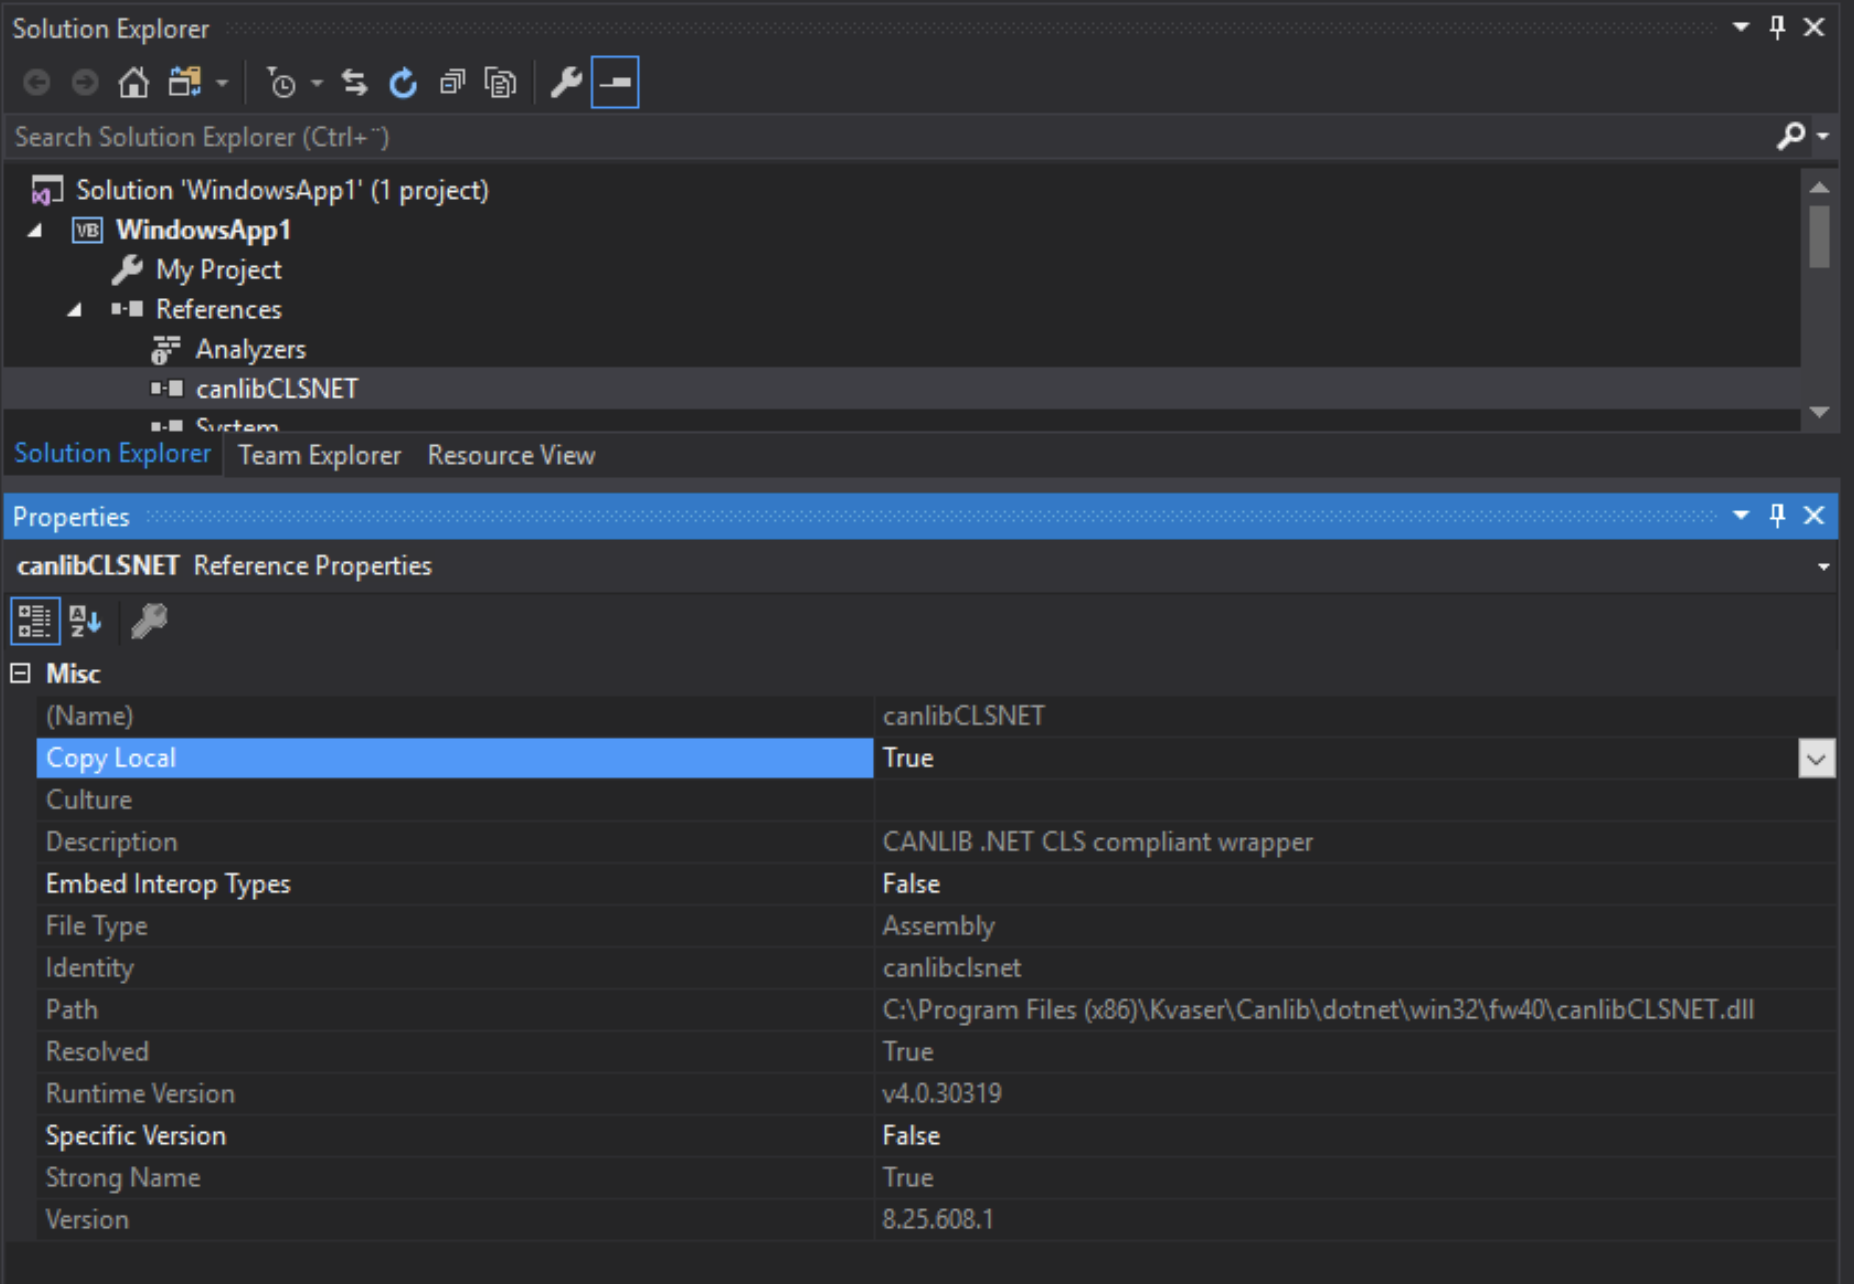
In Solution explorer/references, select canlibCLSNET.

Screen Shot 2018-11-13 at 8.15.47 PM

Change the property “Copy Local” to false.

When I build my application, I get four directories:

.\WindowsApp1\bin\Debug\x86\

.\WindowsApp1\bin\Debug\x64\

.\WindowsApp1\bin\Release\x86\

.\WindowsApp1\bin\Release\x64\

Copy the file canlibCLSNET.dll to the four directories above (make sure that you copy the x86 version to the x86 platform directory, and the x64 version to the x64 directory)

2 – Automatic adding canlibCLSNET for x86 and x64

I want VS2017 to automatically select the correct version of canlibCLSNET.dll when I build my project.

(I assume that you have followed the example and skipped section 7.4.1)

I have found one method to do it (there might be more methods).In my directory structure for the project, there is a file we can edit:

WindowsApp1.csproj.user (ProjName.csproj.user)

But I can not find it! Where is it? OK, no problem. It is not created by default, only when needed. Let us create it! This file is little like Harry Potter’s “Room of Requirement”; it can be almost whatever we want it to be.

Creating the file “ProjName.csproj.user”

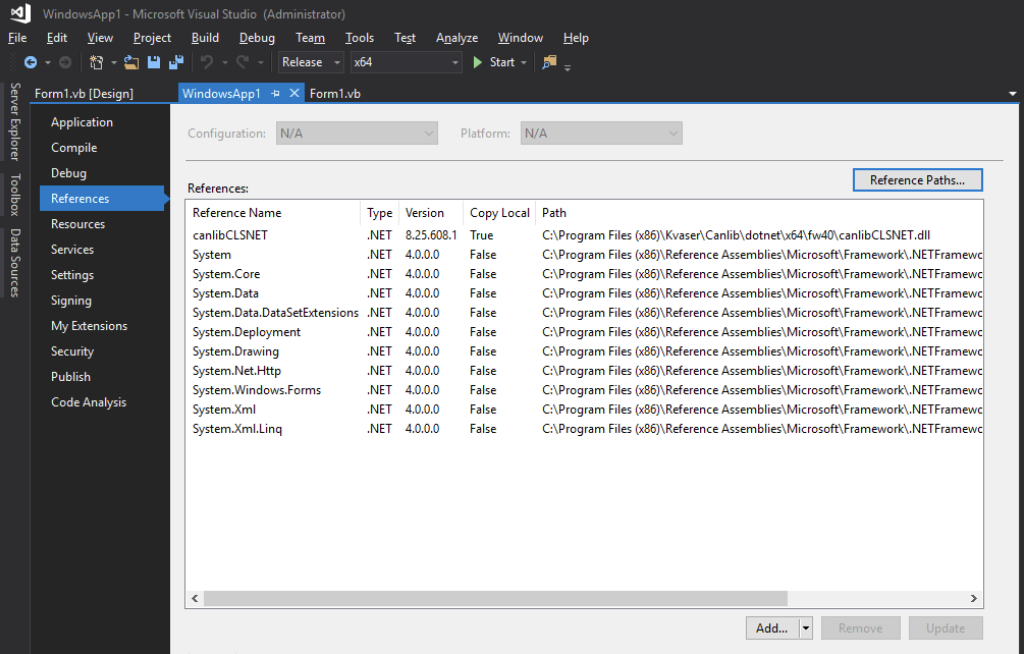
Open “Project” – “ProjName Properties…” as described above in “Verifying Target CPU and setting output path”.

Screen Shot 2018-11-13 at 8.21.07 PM

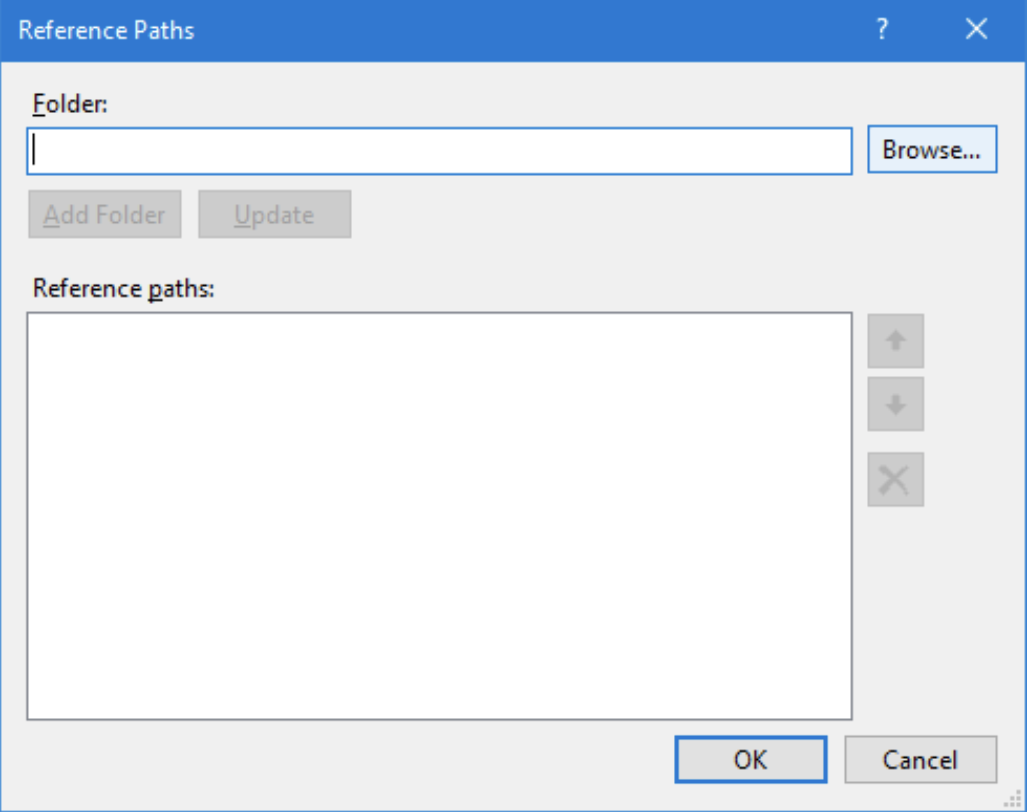
Go to the section “References” and press the button “Reference Path…”

Screen Shot 2018-11-13 at 8.22.07 PM

Press button “Browse”

Screen Shot 2018-11-13 at 8.22.54 PM

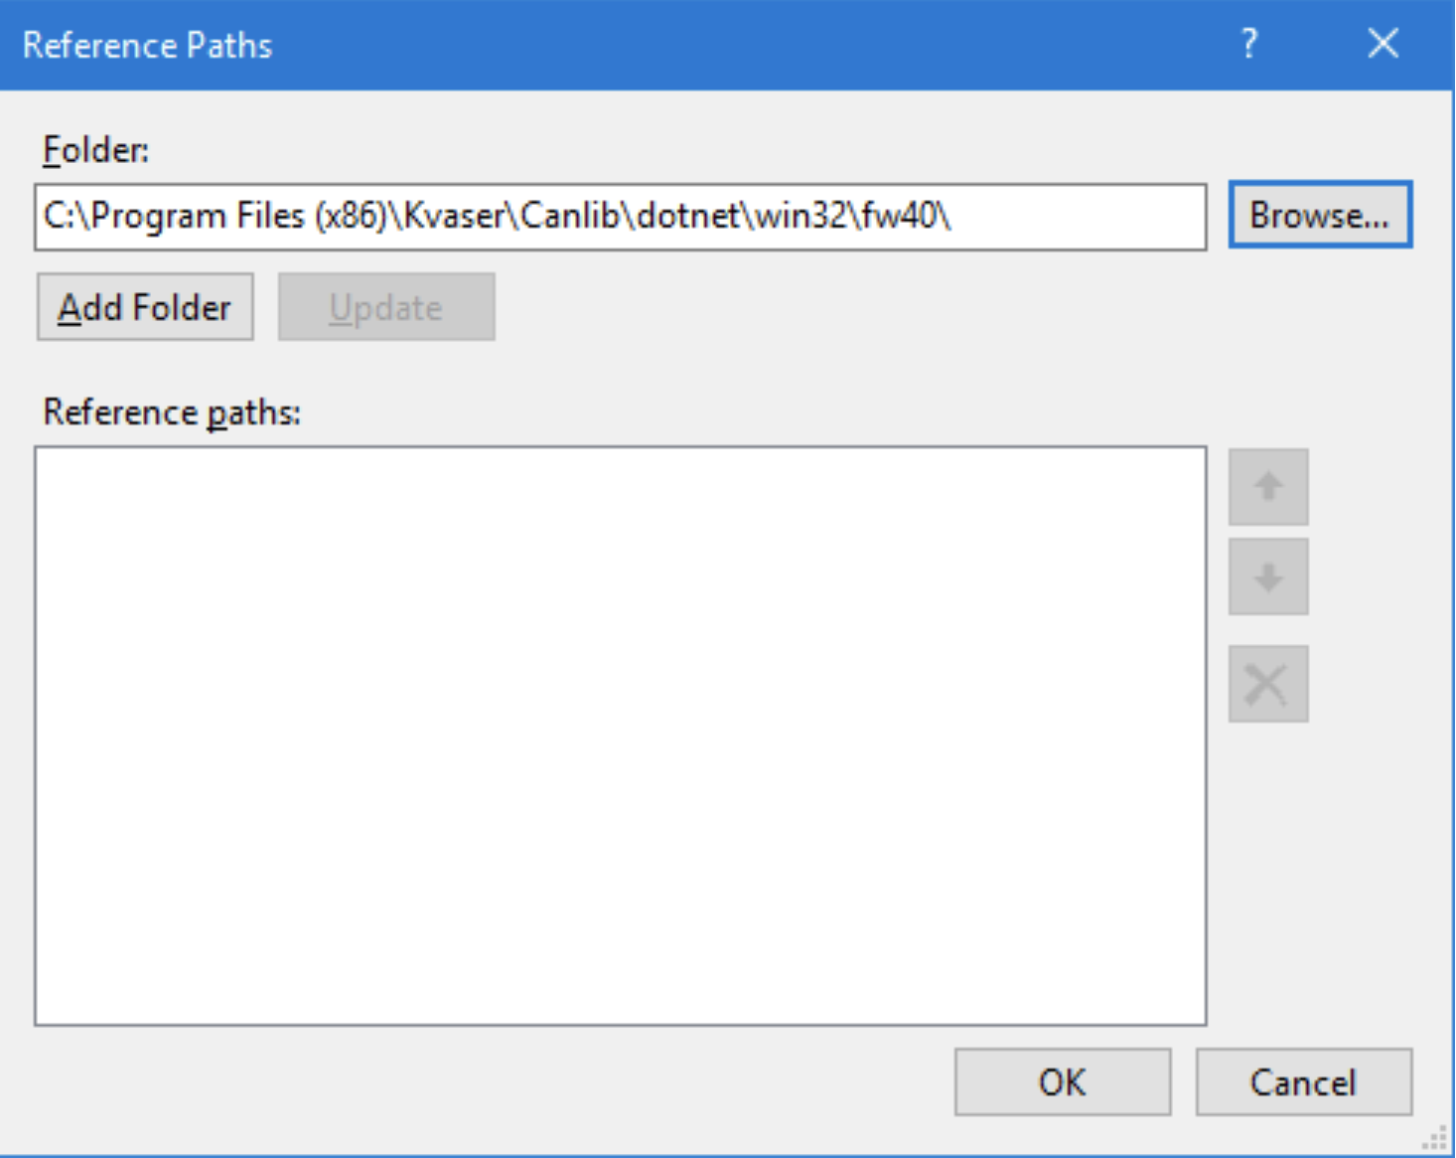
Select directory: ”c:\Program Files (x86)\Kvaser\Canlib\dotnet\win32\fw40\”

Screen Shot 2018-11-13 at 8.24.21 PM

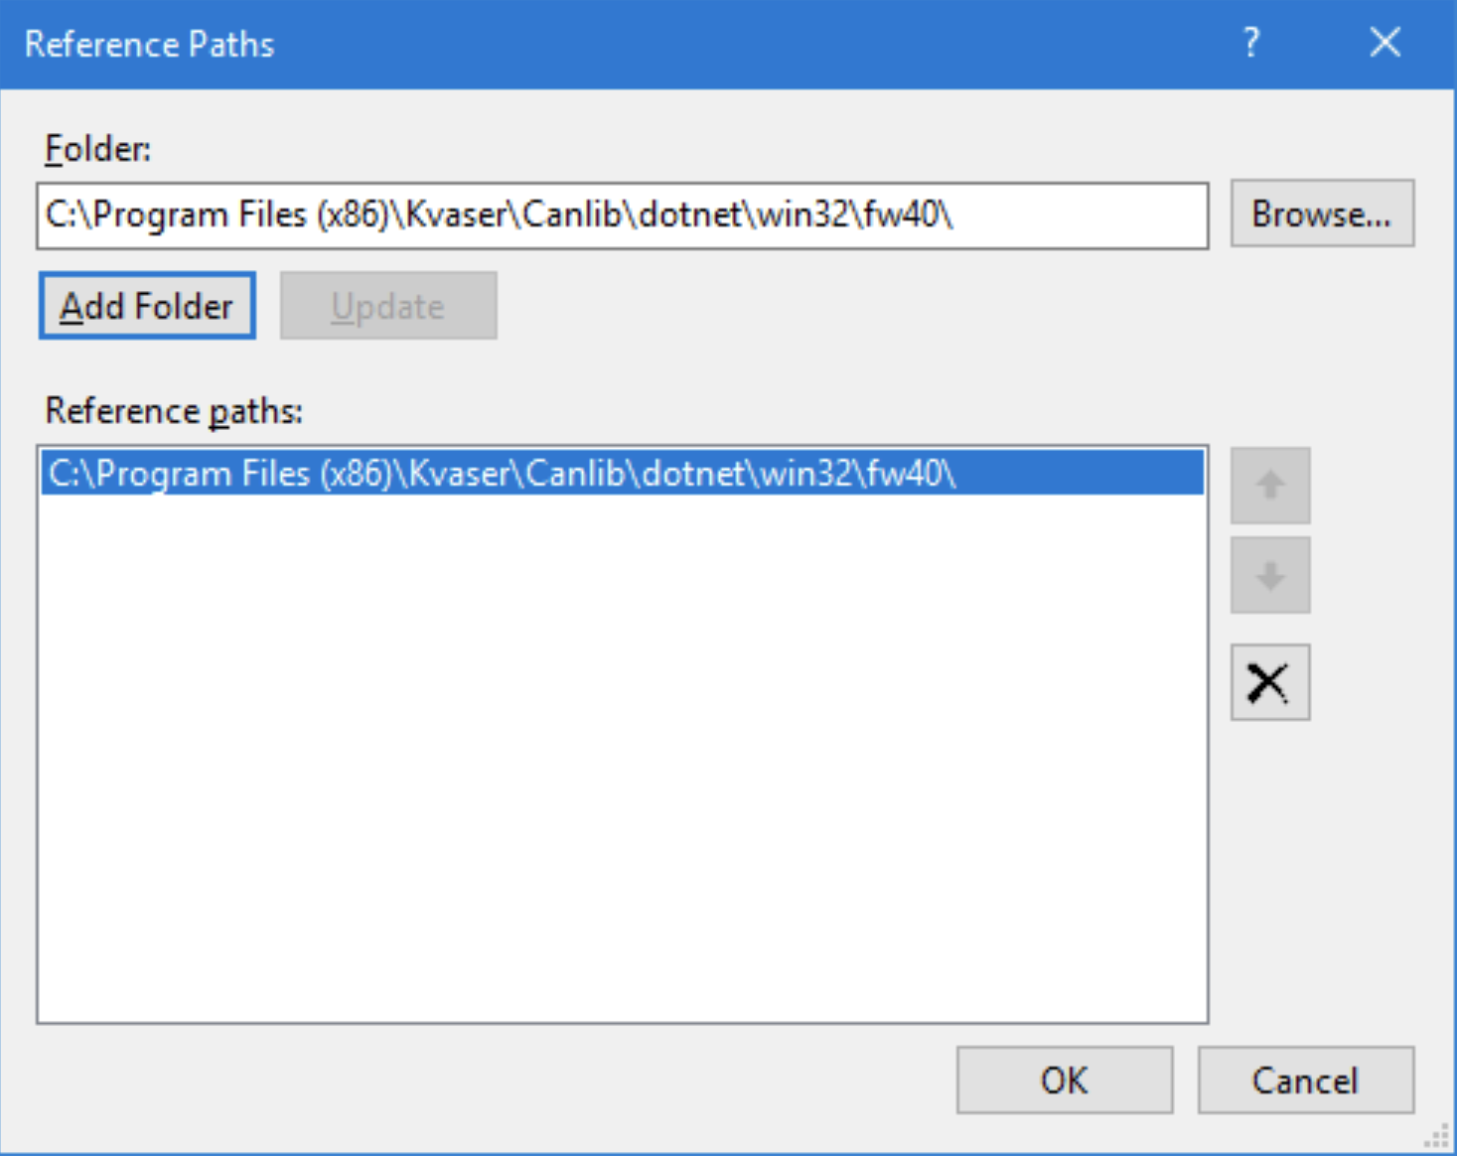
Press the button “Add Folder”

Screen Shot 2018-11-13 at 8.25.27 PM

Press the “OK” button

Screen Shot 2018-11-13 at 8.26.20 PM

I save my project and close VS2017.

Editing the file “ProjName.csproj.user”

Now, when I check my project directory, I can find the file “ProjName.csproj.user”.

Open it in a text editor, and my file looks like this:

(Please note, this file can contain a lot of information, so it is necessary to locate the part where the “ReferencePath” has been defined.)

<?xml version="1.0" encoding="utf-8"?>

<Project ToolsVersion="15.0" xmlns="http://schemas.microsoft.com/developer/msbuild/2003">
 
  <PropertyGroup>

    <ReferencePath>C:\Program Files (x86)\Kvaser\Canlib\dotnet\win32\fw40\</ReferencePath>

  </PropertyGroup>

</Project>

I am now adding some lines, and when I am done, my file looks like this:

<?xml version="1.0" encoding="utf-8"?>
<Project ToolsVersion="15.0" xmlns="http://schemas.microsoft.com/developer/msbuild/2003">
  <PropertyGroup>
    <ReferencePath>C:\Program Files (x86)\Kvaser\Canlib\dotnet\win32\fw40\</ReferencePath>
  </PropertyGroup>
  <PropertyGroup Condition=" '$(Platform)' == 'x64' ">
    <ReferencePath>C:\Program Files (x86)\Kvaser\Canlib\dotnet\x64\fw40\</ReferencePath>
  </PropertyGroup>
</Project>

I added a PropertyGroup with a condition (x64). This group will override the first PropertyGroup if I have selected x64 as platform. It is important that you add the x64 group after the general group.

Please, remember to check the path to the two DLL files.


Microsoft Visual C++ and canlibCLSNET Redistributable

When installing your app on another machine (might not have Visual Studio installed), please remember to redistribute (and install) the “Microsoft Visual C++ Redistributable for Visual Studio 2017”. You will need to copy the canlibCLSNET.dll (x86 and/or x64) with your project executable. These dlls are not installed as part of the driver (they are part of KVASER CANlib SDK).

Thanks for reading this! If you have any questions or comment regarding this paper, please send a mail to SUPPORT@KVASER.COM. 


Build and Run platform x86 and x64

I can now select x86 (win32) and x64 (win64) as active platforms, in both cases the application starts correctly and CANlib is available and working.

If everything worked well, you will also be able to create an VB dotNET CANlib application in Visual Studio 2017.

We have now enabled CANlib in Visual Studio 2017, created a VB .NET project and tested it for both x86 and x64. 

ΟΕΔ  (Q.E.D.  Quod erat demonstrandum)


Author Image

Lars-Göran Fredriksson

Lars-Göran Fredriksson is a Field Application Engineer for Kvaser AB. His background is in geographic information system (GIS) and Remote Sensing and his current focus is on connecting the deep knowledge of Kvaser's developers with the practical questions of our end users. If you doubt his passion for CAN, just know that his first week in the office he created an interactive CAN Trivia game that sent the office scouring the halls for the correct answers. He is a passionate fisherman who would like to develop new environmentally friendly fishing methods. Biggest catch and release fish is for the moment a Bluefin Tuna at appr 325kg / 715lbs.

Debug on...