In order to test using the trig pins, you will of course need a Kvaser Memorator Pro. You do not need an GPS/Arduino test board, but a signal generator can be very handy when testing. An oscilloscope is also very good to have, if you want to see the relationship between the different signals.
There might be situations where you want to detect a digital signal, or want to send a digital signal if a desired action has happened. A Memorator will never replace a PLC or an advanced I/O unit, but in some cases, one digital channel can be enough.
The Kvaser Memorator Pro 2xHS v2 can be set up to trigger on an external signal and can be configured to react on both falling and rising edges.
The Kvaser Memorator Pro 2xHS v2 can be set up to send an external pulse through the External trigger output pin.
On channel CAN1, there is a TRIGGER input and on channel CAN2, there is a TRIGGER output. Both are 5 volt logic and can use TTL levels. Their purpose is to indicate when a certain event happens and perform some kind of action.
When Kvaser introduced the Kvaser DIN Rail SE400S-X10 and its additional units, we included support for handling the I/O pins on the Kvaser Memorator Pro v2 devices. We can now directly control the digital input and output on the Kvaser Memorator Pro units.
It is possible to use the TRIGGER-input on CAN1 and TRIGGER-output on CAN2, as digital I/O controlled via CANLib or t-script.
I will try to show in this paper how to do it and also a little bit of what we can expect from the I/O pins.
I will use Kvaser t-scripting for the demonstration, but it is also possible to use CANlib. The procedures used in CANLib are almost identical with the one used in t-scriptss.
You can find the t-scripting manual here
Some useful information about CANLib I/O functions;
https://www.kvaser.com/canlib-webhelp/page_user_guide_kviopin.html
To be able to show the behavior of the digital signals, I must have a signal generator that generates a digital signal. I will use an oscilloscope to show the relationship between the CAN-frames and the digital signals.
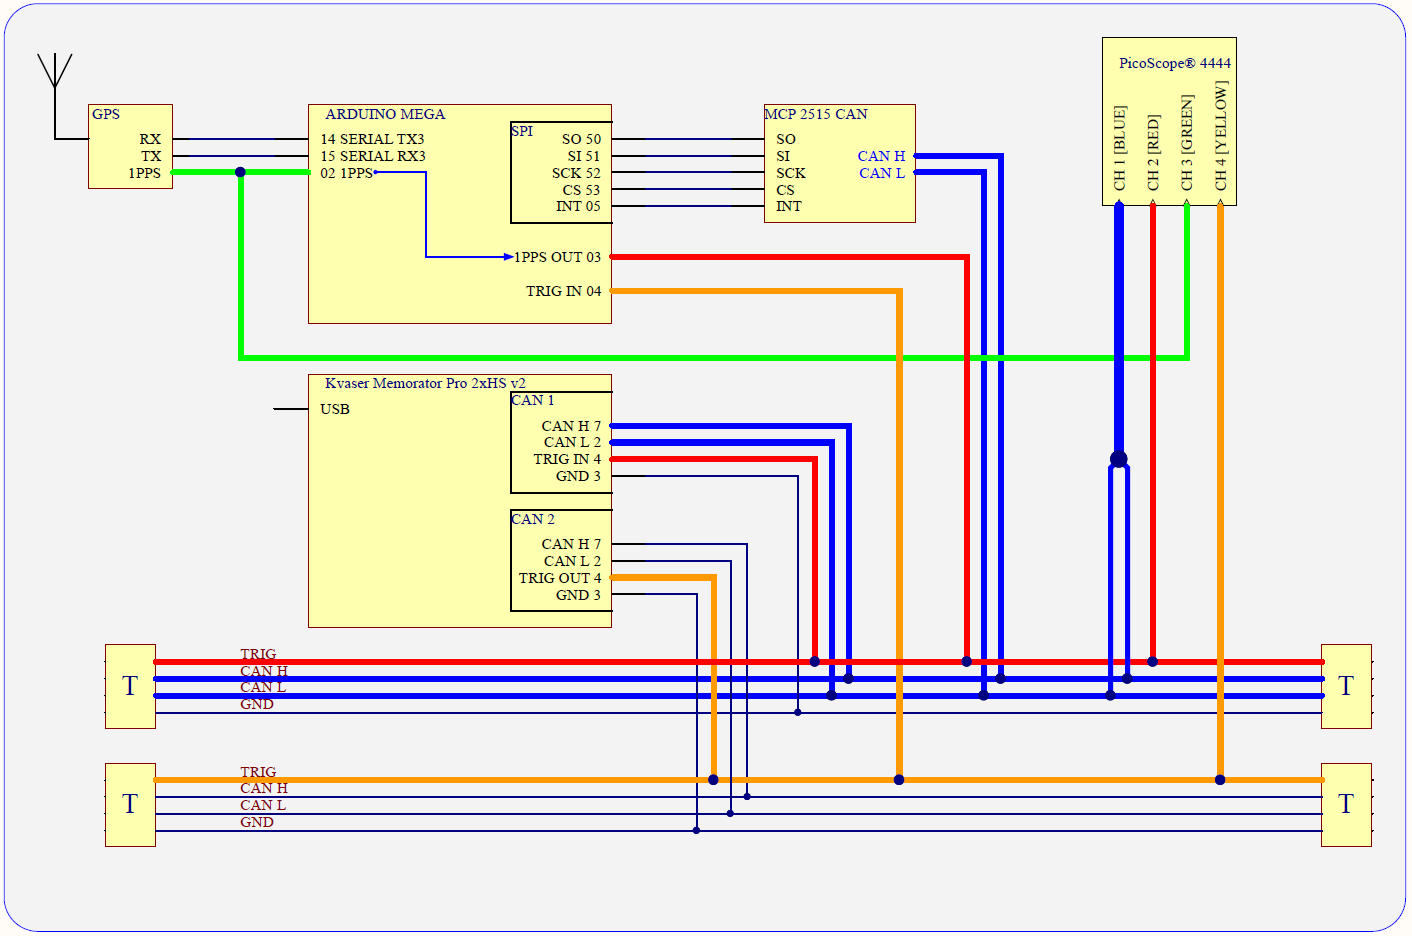
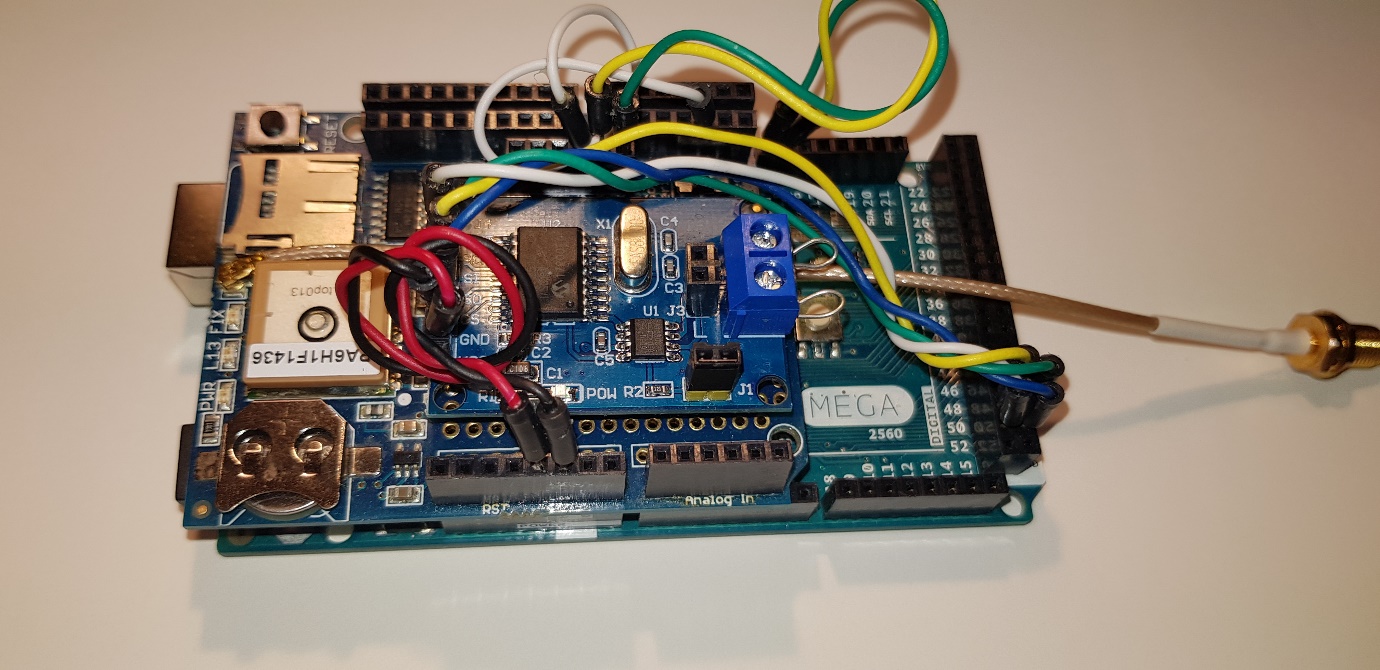
I use a small Arduino computer that is connected to a GPS module and also to a MCP2515 module (CAN controller).
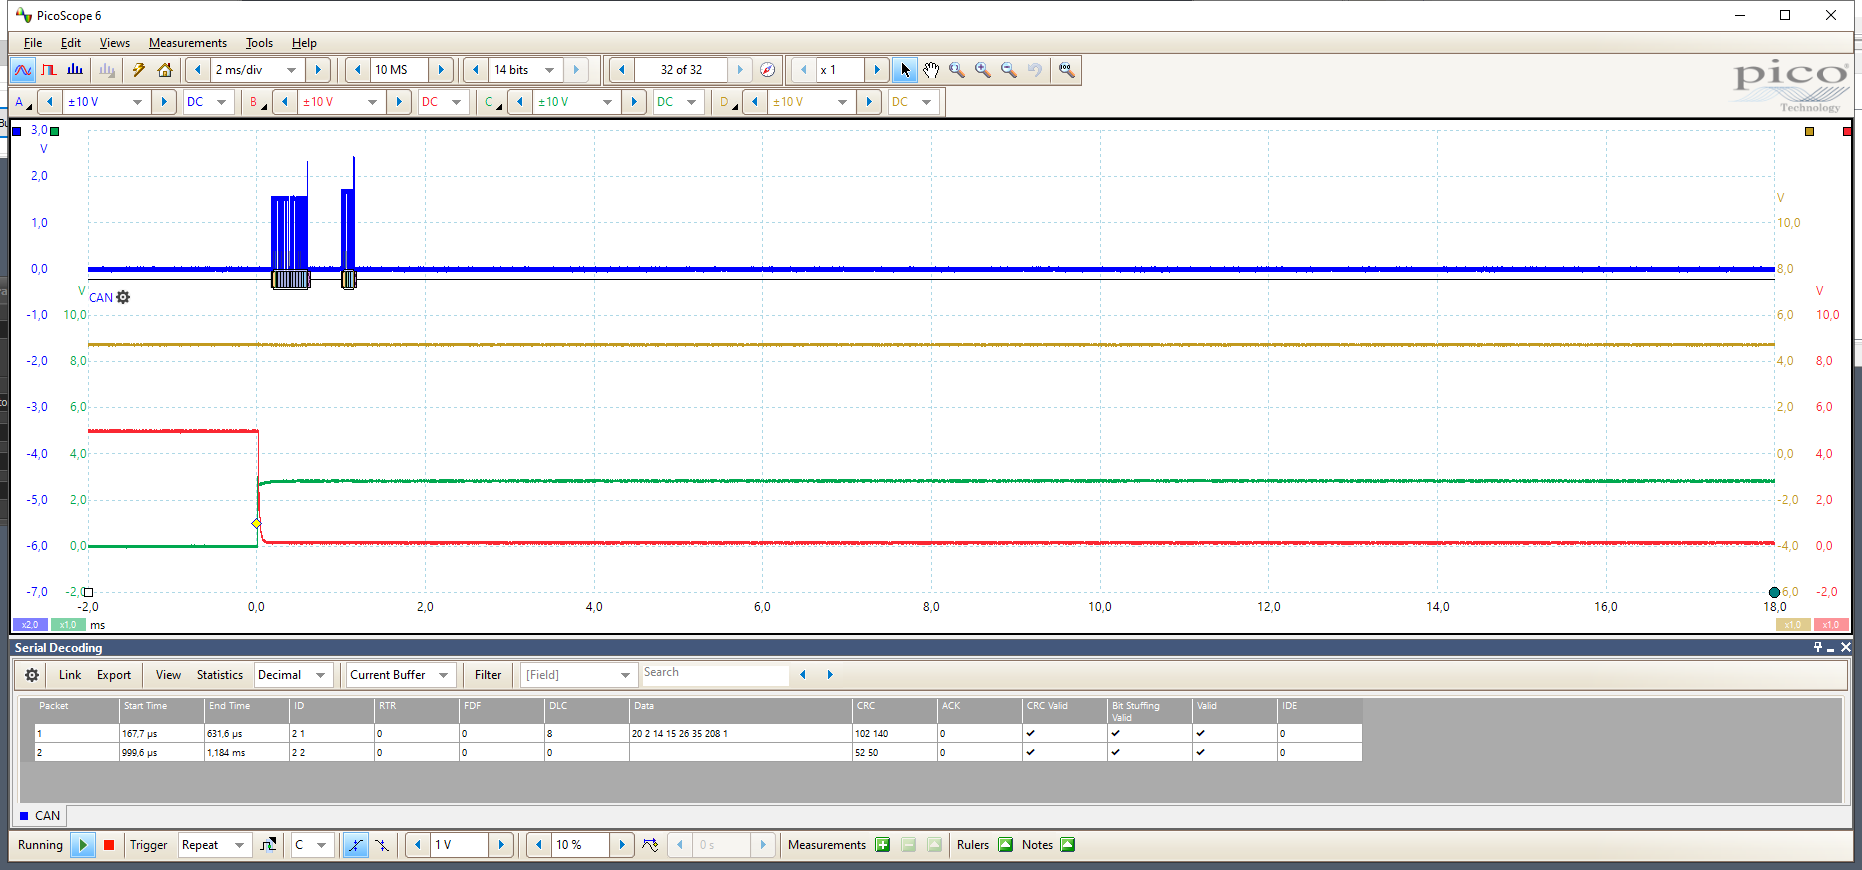
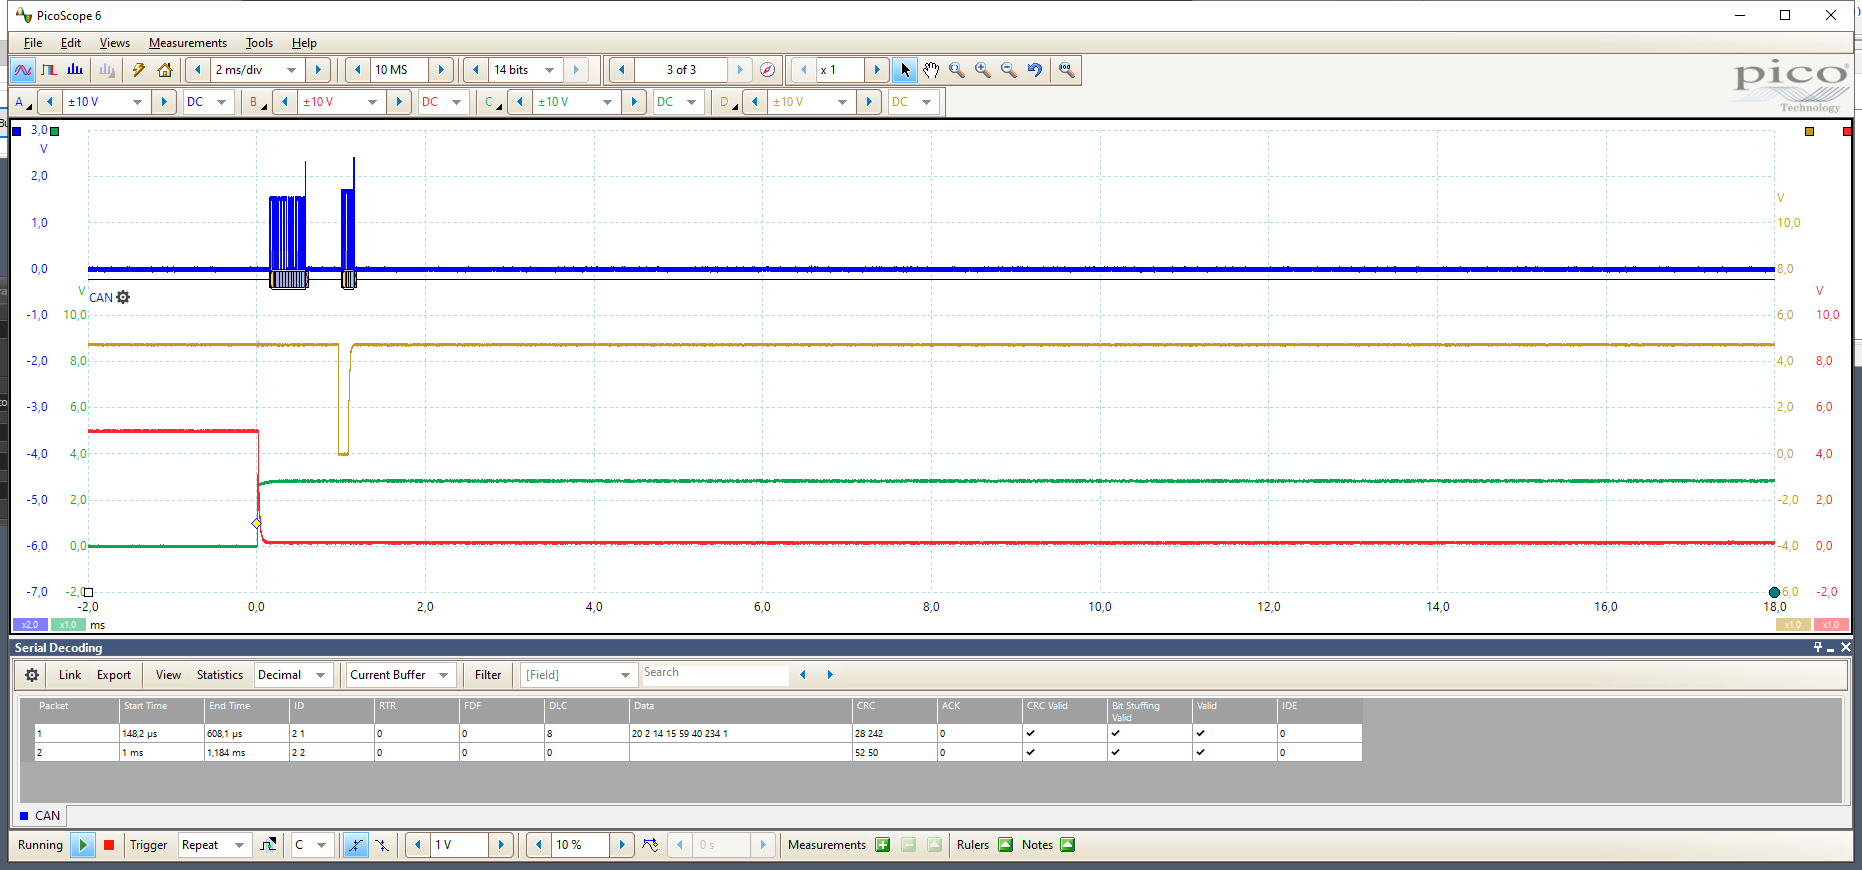
The GPS generates a 1PPS (1 Pulse Per Second) signal [GREEN wire]. This signal is connected to one of the digital inputs on the Arduino and to my oscilloscope.
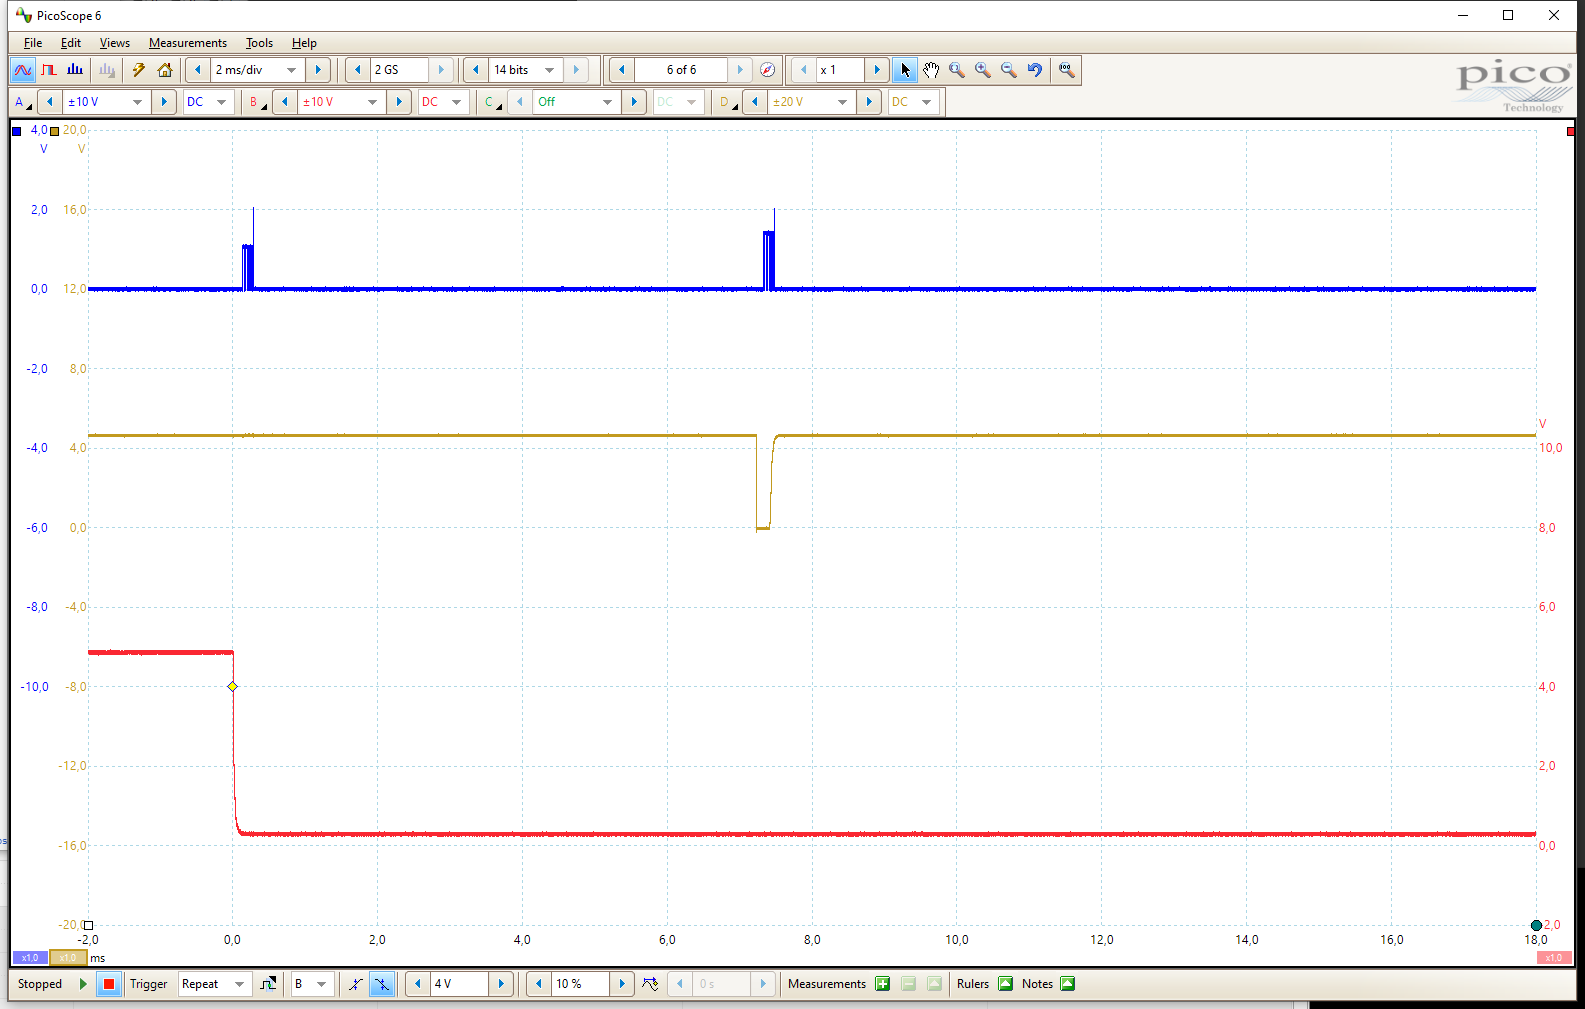
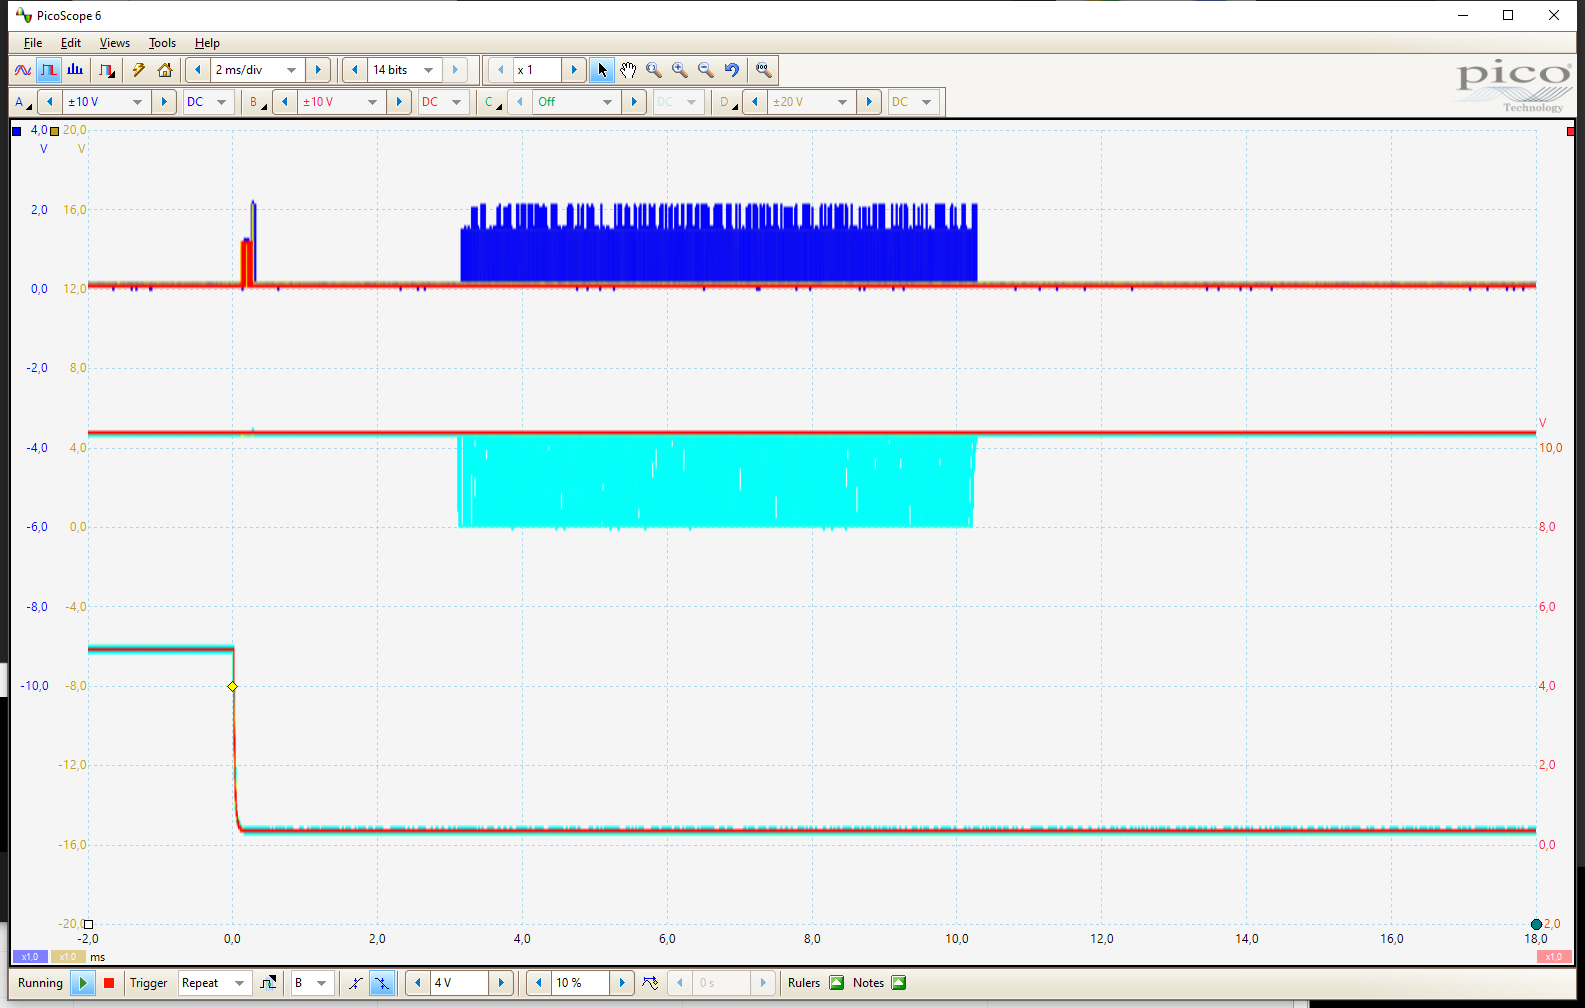
Every time the GPS sends the 1PPS signal, the Arduino generates a 35 ms long pulse [RED wire]. This pulse is sent to the TRIG input on a Memorator Pro. At the same time the Arduino sends a “0x201 msg” to the CAN bus [BLUE wire].
The Memorator can also control the TRIG output on CAN2 [ORANGE wire]. It is connected to the Arduino, and the Arduino has a built-in pullup resistor.
All described signals are connected to a differential USB oscilloscope.
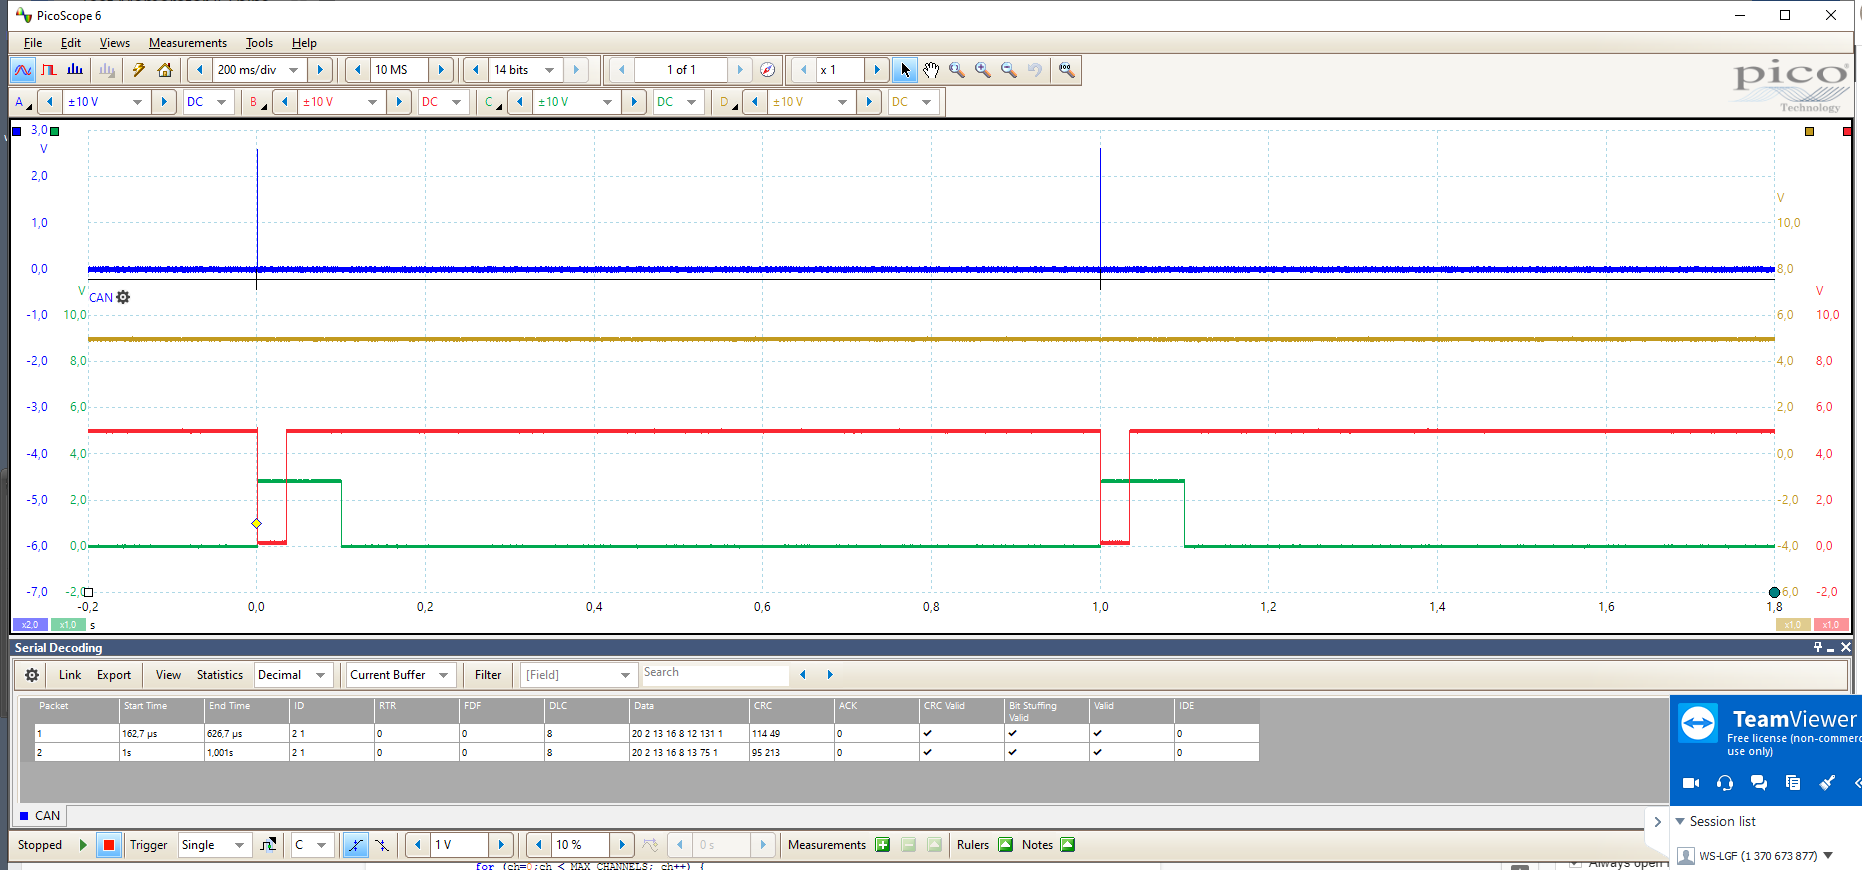
As you can see in the picture, the GPS[GREEN] uses 3.3V logic and the Arduino creates a 5V negative pulse [RED].
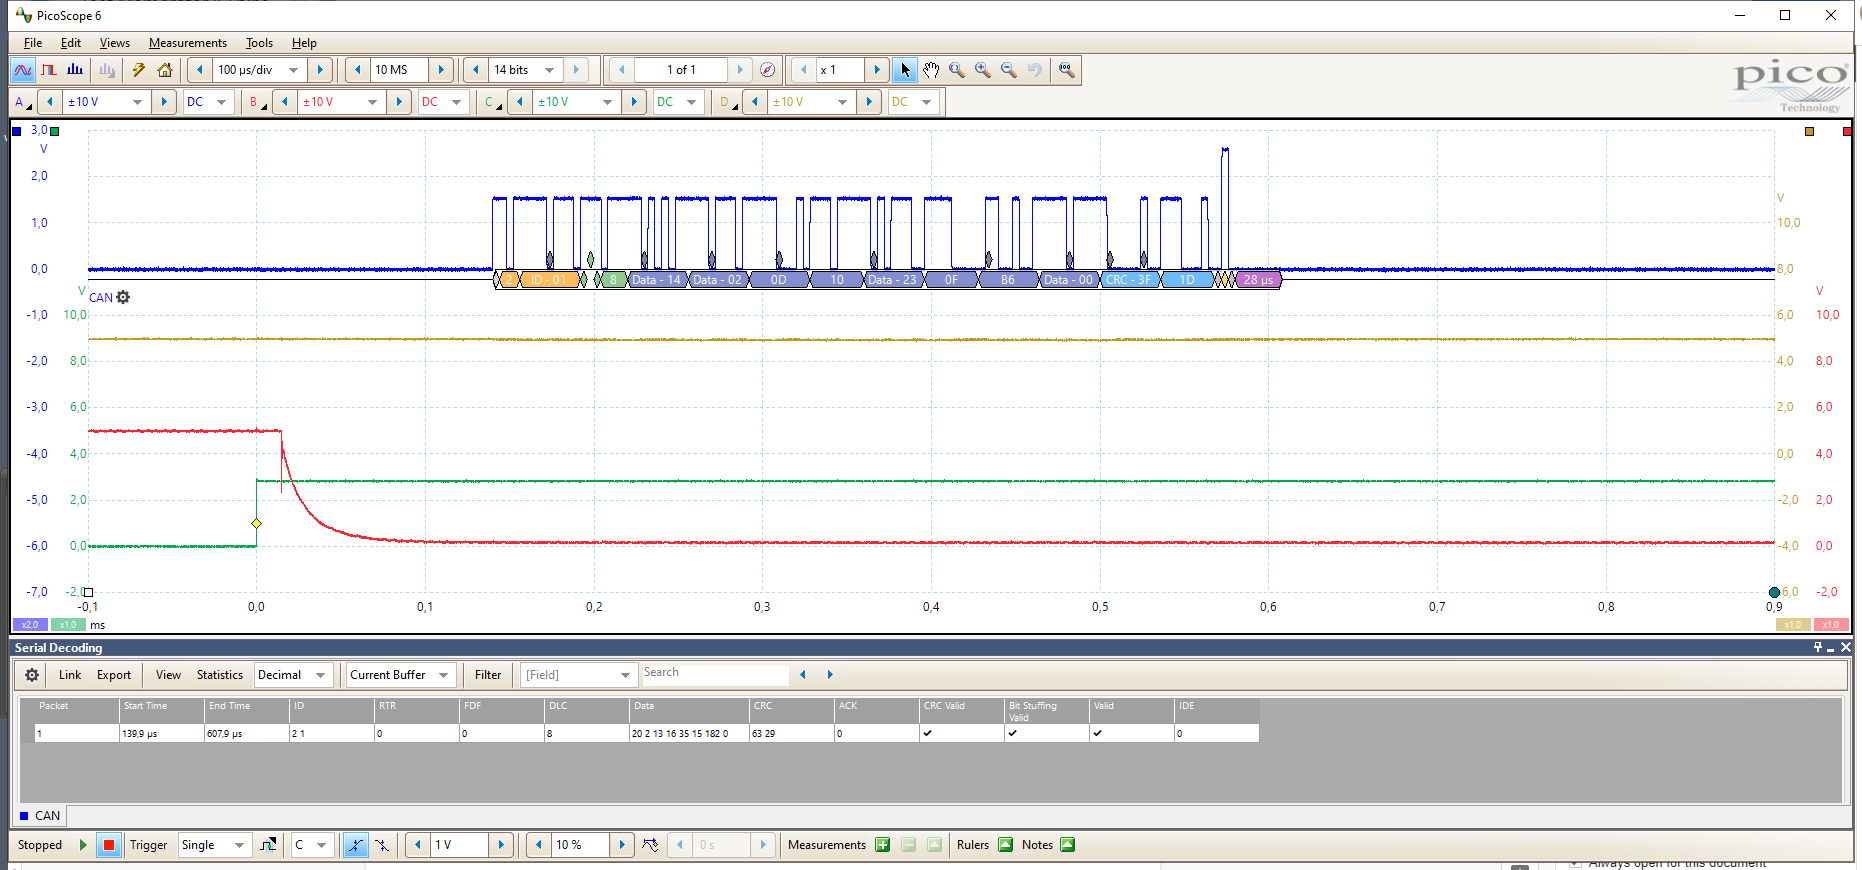
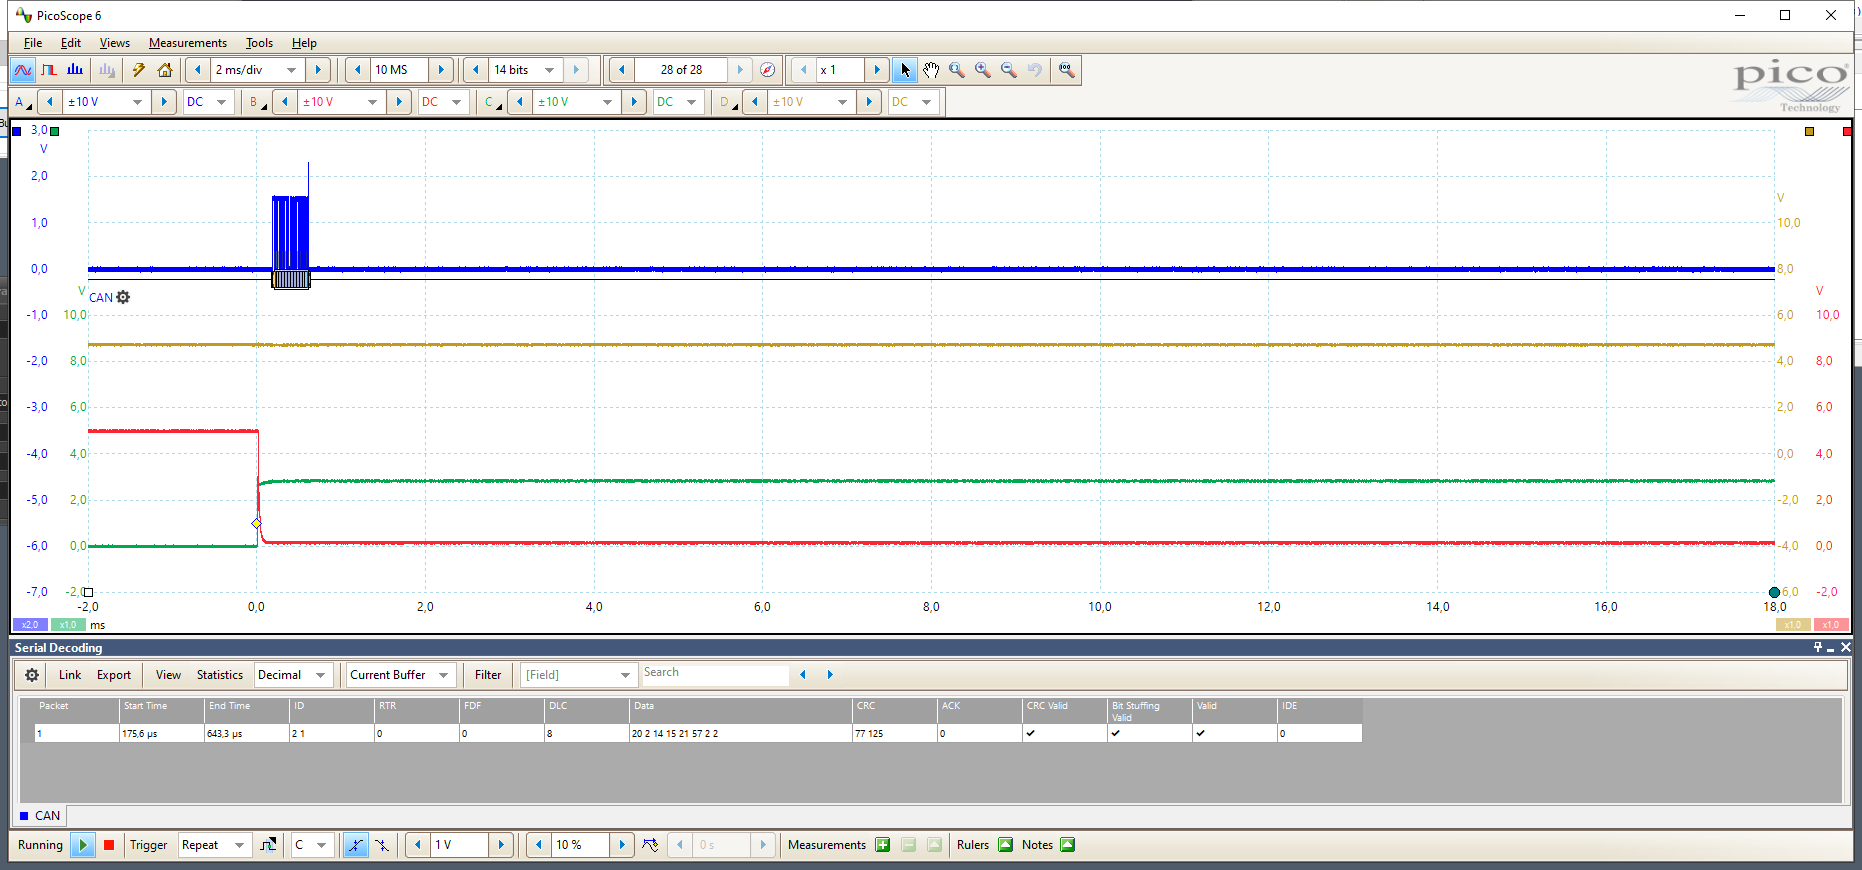
If we look a bit closer, then we see that when 1PPS [GREEN] goes high, the TRIG [RED] will go low after approximately 16 μs. After approximately 140 μs we can see that the Arduino via the MCP2515 sends out a CAN message [BLUE]. It has the ID of 0x201 (dec 513).
The program that runs on the Arduino is not listed in this paper. Please send an email to lgfr@kvaser.com and I will email it to you.
